


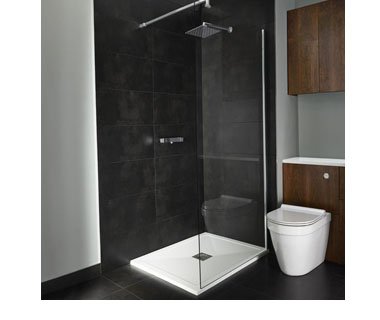
When installing a new shower, we tend to think carefully about the shape and style that will suit us best when we want to nip in for a quick refresh or indulge in a luxury soaking. However, it’s not often we consider the tray that rests beneath our feet, catching all the excess water and faithfully carrying it away.
However, a shower tray is a vital component for any shower, and it is something you can install yourself if you have advanced DIY skills and the proper materials at hand.
Preparation

Before installing a shower tray in your bathroom, there are a few things to keep in mind. It is important that the tray is completely watertight and correctly sealed, or water could escape and damage the surrounding features. The location for installation must also be firm and level.
All plumbing work should be complete before installation, and a waste pipe (which will carry the excess water away from the shower and out into your plumbing system) must be fitted through the floor. Depending on the size and style of the waste pipe, the type of shower tray you need to fit in your bathroom will vary.
If the waste trap (the fitting that connects the plughole of the shower to the waste pipe) is flush with the floor, you can install the tray directly over the top. If the waste pipe is fitted above the floor, the tray will need to be raised and installed over the top.
It is important to review the steps for attaching the waste beforehand, as if your shower tray is fitted to the floor you may need to create an access hatch so you can attach the appropriate fittings after the tray has been placed.
Note: The installation process will vary, depending on your shower tray, and so it is always important to follow the manufacturer instructions alongside this guide.
Materials
If installing directly onto the floor:
- Silicone
- Mortar – either a weak cement mixture or tile adhesive
- Primer (such as PVA glue)
- Trowel
If installing a raised tray:
- Screwdriver
- Measuring tape
- Pencil
- Hacksaw (if trimming front panel)
1. Get ready to position your tray
Remove the protective covering in the area around the plug hole, and on the sides where the tray will meet the wall. Make sure the correct fittings are attached to the top of the waste pipe and secure the waste fittings around the plughole of the shower tray.
If you are installing the tray directly onto the floor, line it up over the waste trap to make sure it fits into place. Outline the edge of the tray with your pencil – this will help you to determine where to spread the mortar.
If you are installing a raised tray, insert the feet into the correct positions, using your screwdriver and the fittings provided. With the help of your spirit level, make sure they are even and adjusted to the height specified in your manual. Attach the clips onto the edge where the front panel will be fitted.
2. Placing the tray
If you are installing the tray directly onto the floor, spread a 1.5cm layer of mortar evenly over the area you marked out with your pencil. Cover the bottom of the tray with a thin layer of adhesive and fit it in place. Be sure to line up the plughole exactly with the waste fitting. Check that the tray is resting evenly using your spirit level.
If you are installing a raised shower tray, set it in place and make sure it fits over the waste trap. With your spirit level, ensure that the tray is sitting evenly – adjust the height of the feet as necessary. When you are happy with the layout, apply silicon sealant or adhesive to the bottom of the feet and fix the trap to the floor.
3. Adding the final touches
If your shower tray kit included a wall sealant strip, secure it to the tray at the sides where it meets the wall. If not, use your caulking gun and apply a thin layer of silicone to create a watertight seal along the edge of the tray.
Remove the rest of the plastic covering and secure the waste outlet to the trap, according to the manufacturer guidelines. This may be something you can simply tighten into place from above, or you may have to navigate from beneath the tray in order to secure the fittings.
If you are tiling your bathroom, seal the edges where the tray meets the walls with silicone, using your caulking gun. In the case of a raised shower tray, measure the length of the tray and, if necessary, cut the front panel to size. Fit it into place by pushing it onto the panel clips.


