
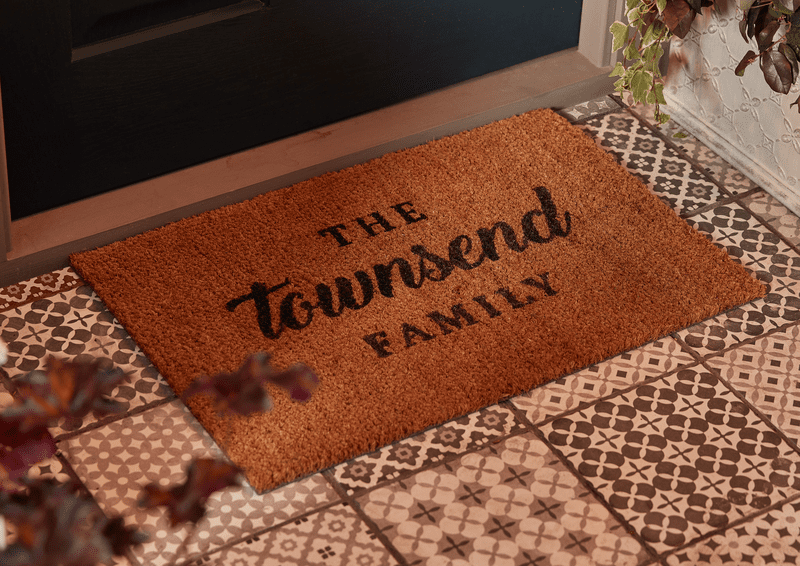

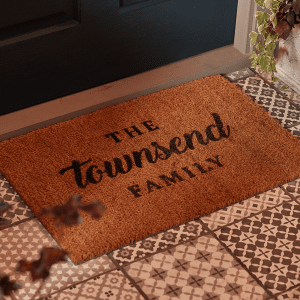
Add a unique twist to welcoming guests into your home with a personalised door mat.
With a DIY door mat, you can customise your front door with a fun, welcoming message, your family’s name or any symbols or emojis you desire.
To help you out, we’ve put together this simple how-to guide to take you through how to create your own one-of-a-kind front door mat, so you can create some real kerb appeal.
Let’s get started with what you’ll need…
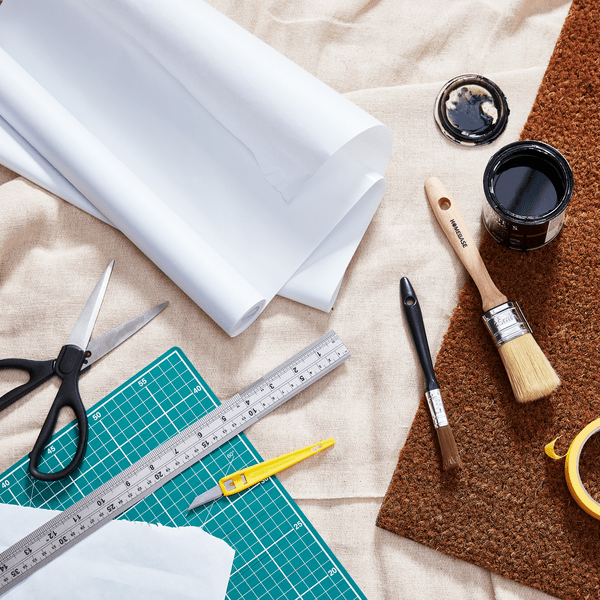
Materials:
- Acrylic paint
- Plain doormat
- Freezer paper or vinyl
- Cutting mat
- Pins
- Clear spray sealer
Tools:
Before you start
This project requires the use of tools so, to keep yourself safe, read each tool’s instruction manual and our DIY Safety Tips beforehand. Keep the space ventilated or try to paint outside where possible.
Prepare your design
First, decide what you want your doormat to say and how large you want your design to be. Measure the doormat to work out spacing – whether you want your design to have a border, if you want the text to be centered and so on. We suggest creating your design on freezer paper, but you can also use vinyl.
Cut out your design
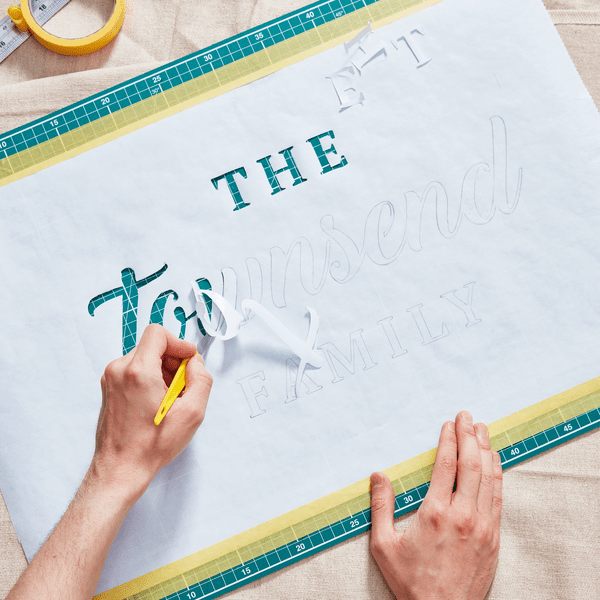
Using a sharp cutting tool, carve out your design on a cutting mat. You’ll want to use a weeding tool for any trickier areas, to ensure your stencil is as clean cut as possible. Then, remove the freezer paper ‘stencil’ from the cutting mat.
Top tip: Mark both the center of your stencil and middle of your door mat, then line up those marks so you know your design is centered.
Iron on the design
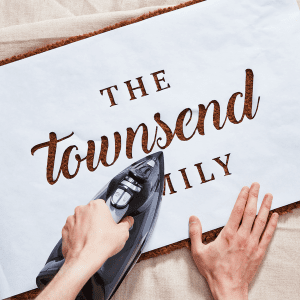
Next, iron your design onto your plain doormat to attach it temporarily. Try not to slide the iron, but instead pick it up and down – holding each area for about 10 seconds. If any sections are being stubborn to stick down, just use little pins to keep the stencil in position.
Get painting

Then, paint away to create your personalised door mat! Try to paint vertically as much as you can, as painting horizontally makes it more likely for the paint to bleed under the stencil. Or, if you’re using acrylic paint and a sponge, just firmly dab straight downwards.
Top tip: Work from the outside inwards to prevent pulling up the stencil as you go.
Remove the stencil
Make sure the paint is fully dried and then use a spray sealer to seal your new personalised door mat design before removing the stencil. Use a small paint brush to make any corrections or touch-ups where needed.
And that’s it! Once you’ve created your own front door mat, share the final result with us using @Homebase_UK. If that’s given you a taste for DIY, check out our other DIY ideas here.


