Decorating Ideas

How To Make A DIY Candle Holder

how to make a diy candle holder

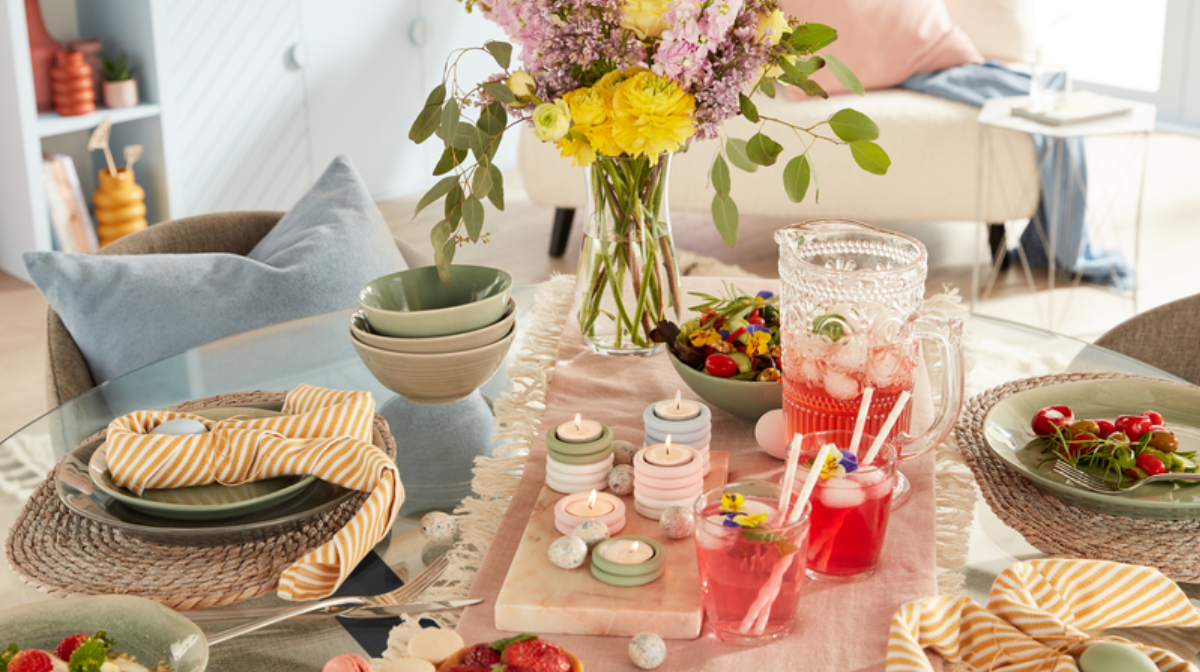
Whether it’s to create a calming environment in your bathroom or accessorise a mantlepiece, candles are a quick and cost-efficient way to take your home decoration to the next level. Candles are also a great option for renters, as they can help to transform a space without the need for drilling holes or painting walls. It’s all about those small changes and getting creative with colours.

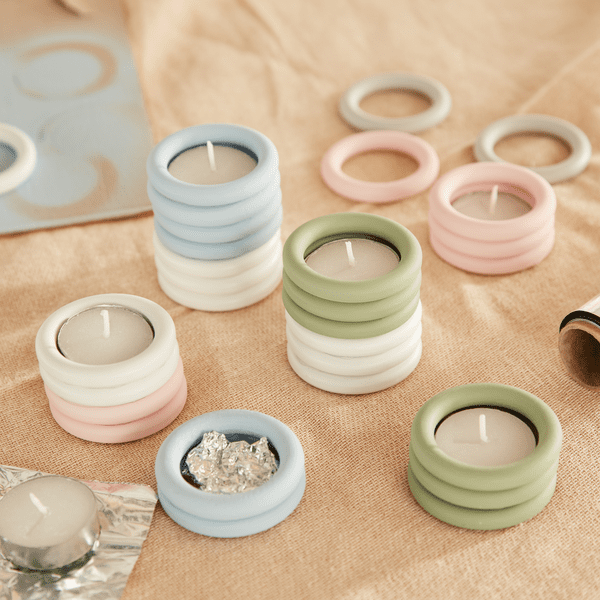
When it comes to candle decor, you don’t need to invest in luxury candles to make an impact – tea lights can work just as well with the help of a decorative candle holder.

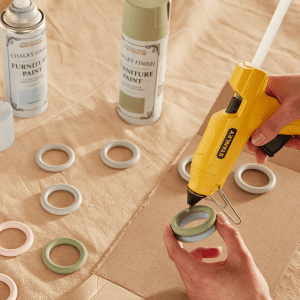
So, grab your glue gun and spray paint! Below is a super simple guide on how to make your own DIY candle holder with curtain rings.

What you’ll need

Materials:

Tools:

How to make a DIY candle holder in 4 steps

Step 1. Choose your curtain rings

The beauty of this decorative candle holder is that it’s totally customisable. You can use identical curtain rings for uniformity or varying shapes and sizes for more of an eclectic look. As long as they stack on top of each other, it’s totally up to you.

Step 2. Get painting

paint your curtain rings

Before you start painting your DIY candle holder, make sure the eye screws have all been removed from the rings. These should unscrew easily but a pair of pliers will also do the trick.

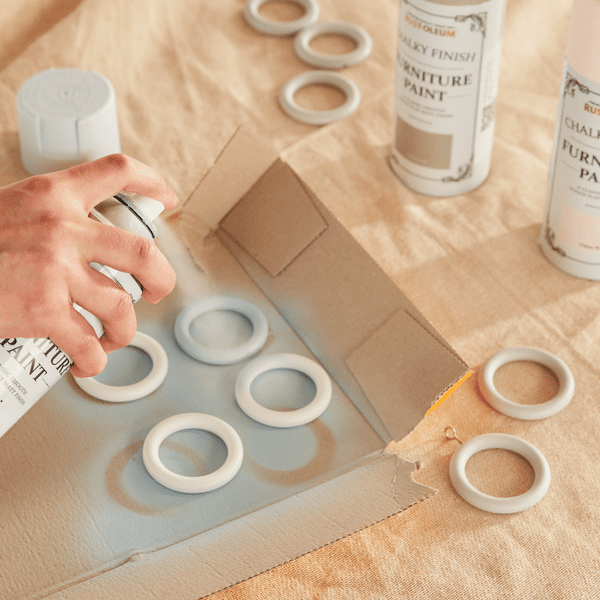
When choosing your paint, it’s important to consider both colour and effect. Spray paint is easy to work with and will give you the best finish. Opt for creamy pastel shades for Summer or bright whites and cooler greys for more of a modern candle holder aesthetic. Alternatively, create a quirky design by layering multiple colours. Don’t be afraid to experiment and have fun!

Top tip: place your curtain ring on an old piece of cardboard and evenly spray with paint, ensuring each side is covered.

Step 3. Start stacking!

stack your curtain rings with glue gun

Once the paint has fully dried, it’s time to assemble your personalised candle holder.

Always check the instructions when setting up your glue gun and place in a safe space while heating.

Add a thin layer of glue to the top surface of one curtain ring and carefully place another on top. Continue stacking the rings until you have your desired height. It’s best to work in sections as this will give the glue a chance to dry without adding too much weight.

Create multiple versions of your tea light candle holder in different heights for a clustered aesthetic. Grouped together, candle holders make a great dining or coffee table centre piece.

Top tip: Glue guns are hot! So be cautious and wear protective clothing where necessary. 

Step 4. The final touches

add tin foil to the base of your candle

Once the glue has dried, create a base for your tea light to sit with some scrunched up kitchen foil – you want this to be super compact and sturdy so really pack it in there. The top of the candle holder should align with the metal base of the tea light, make sure you’ve left enough space and conceal the foil for a professional finish.

You can used scented or unscented tea lights for your DIY candle holder, depending on preference.

Fresh or citrusy candles work well in a bathroom space while sweeter scents are perfect for creating a cosy atmosphere in your bedroom. Alternatively, unscented tea lights are best for the kitchen or dining room area – making it all about the aesthetic.

You can also use your candle holders to inject some colour and texture to your shelves – style with plants to break up the space or picture frames for a personal touch. Check out our design guide for more inspiration.

And there you have it! A quick and easy guide on how to make a candle holder. Why not turn this DIY activity into a weekend project? Check out our dining room transformation ideas to get your started.

Don’t forget to share your DIY candle holder creations @homebase_uk and visit our Ideas & Advice page for more home renovation tips.


Homebase

Homebase

Writer and expert