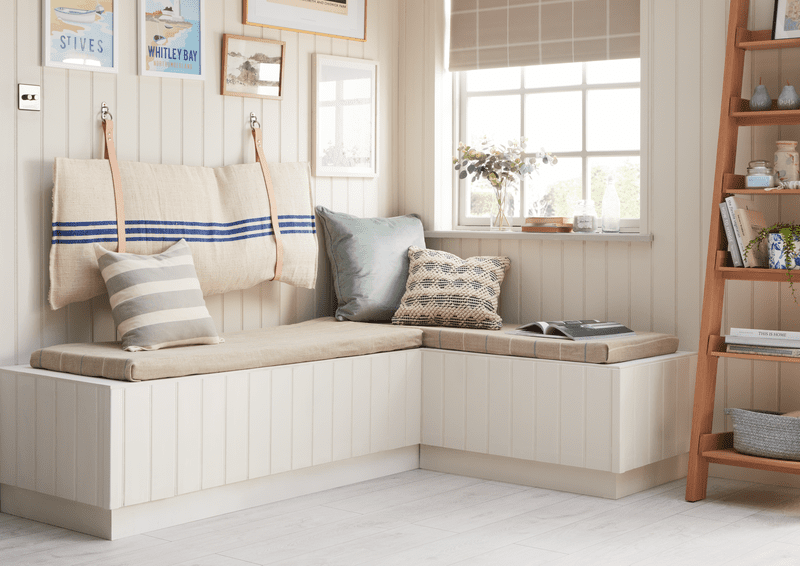

Creating a storage bench seat is an ideal how-to project for those wanting a new, cosy perch. The perfect place for curling up with a good book, relaxing with friends or having a little me-time, a window seat with storage will create the perfect place to unwind, while also providing some great hidden organisation space too.
Let’s get started with what you’ll need…
Materials:
- Sawn treated softwood timber (length will depend on how big you want to make the storage bench)
- MDF (for the seating)
- Plywood or panelling (for decorative frame)
- Wood glue
- Screws
- Measuring tape
- Hinges
- Wall fixings
Tools:
1. Plan & measure
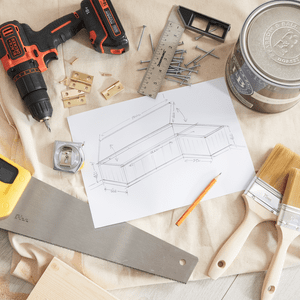
First, decide on the height and length you want your DIY storage bench seat to be. The average height of a chair is 18 inches high. Sketch a plan of the unit design and measurements of where you want it in your room.
2. Remove skirting boards
Next, you may need to remove any skirting boards. This is so you can build your storage bench seat flush to the wall. Mark out the height and length you want your DIY storage bench to be on your wall with a pencil.
3. Cut your wood to size
Now it’s time to cut your wood to size. Do this safely and in a well-ventilated space using a mitre or circular saw.
4. Build the frame
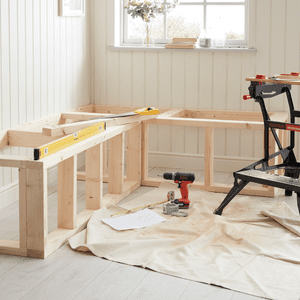
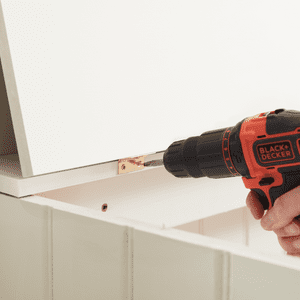
To build the frame of your storage bench, attach a long piece of sawn treated softwood timber to your wall with your drill and screws. This is to form the longest side of the bench. Follow this by attaching the shorter piece of timber that you plan to use to form the corner of your storage bench, to the adjacent wall. Use a spirit level to ensure that they are level before you mount to the wall.
Make your frames. Start with your end frames and then your front frames for the long side and the short side. (Your short seating side may actually be a similar size frame as it will be pushed up to the wall in the corner). To attach the wood together, use the Kreg pocket hole jig. Drill your holes and use the Kreg screws to attach the wood. The use of the Kreg corner clamp will be very handy here to keep the wood together. Use a wood glue to add that additional fixing.