
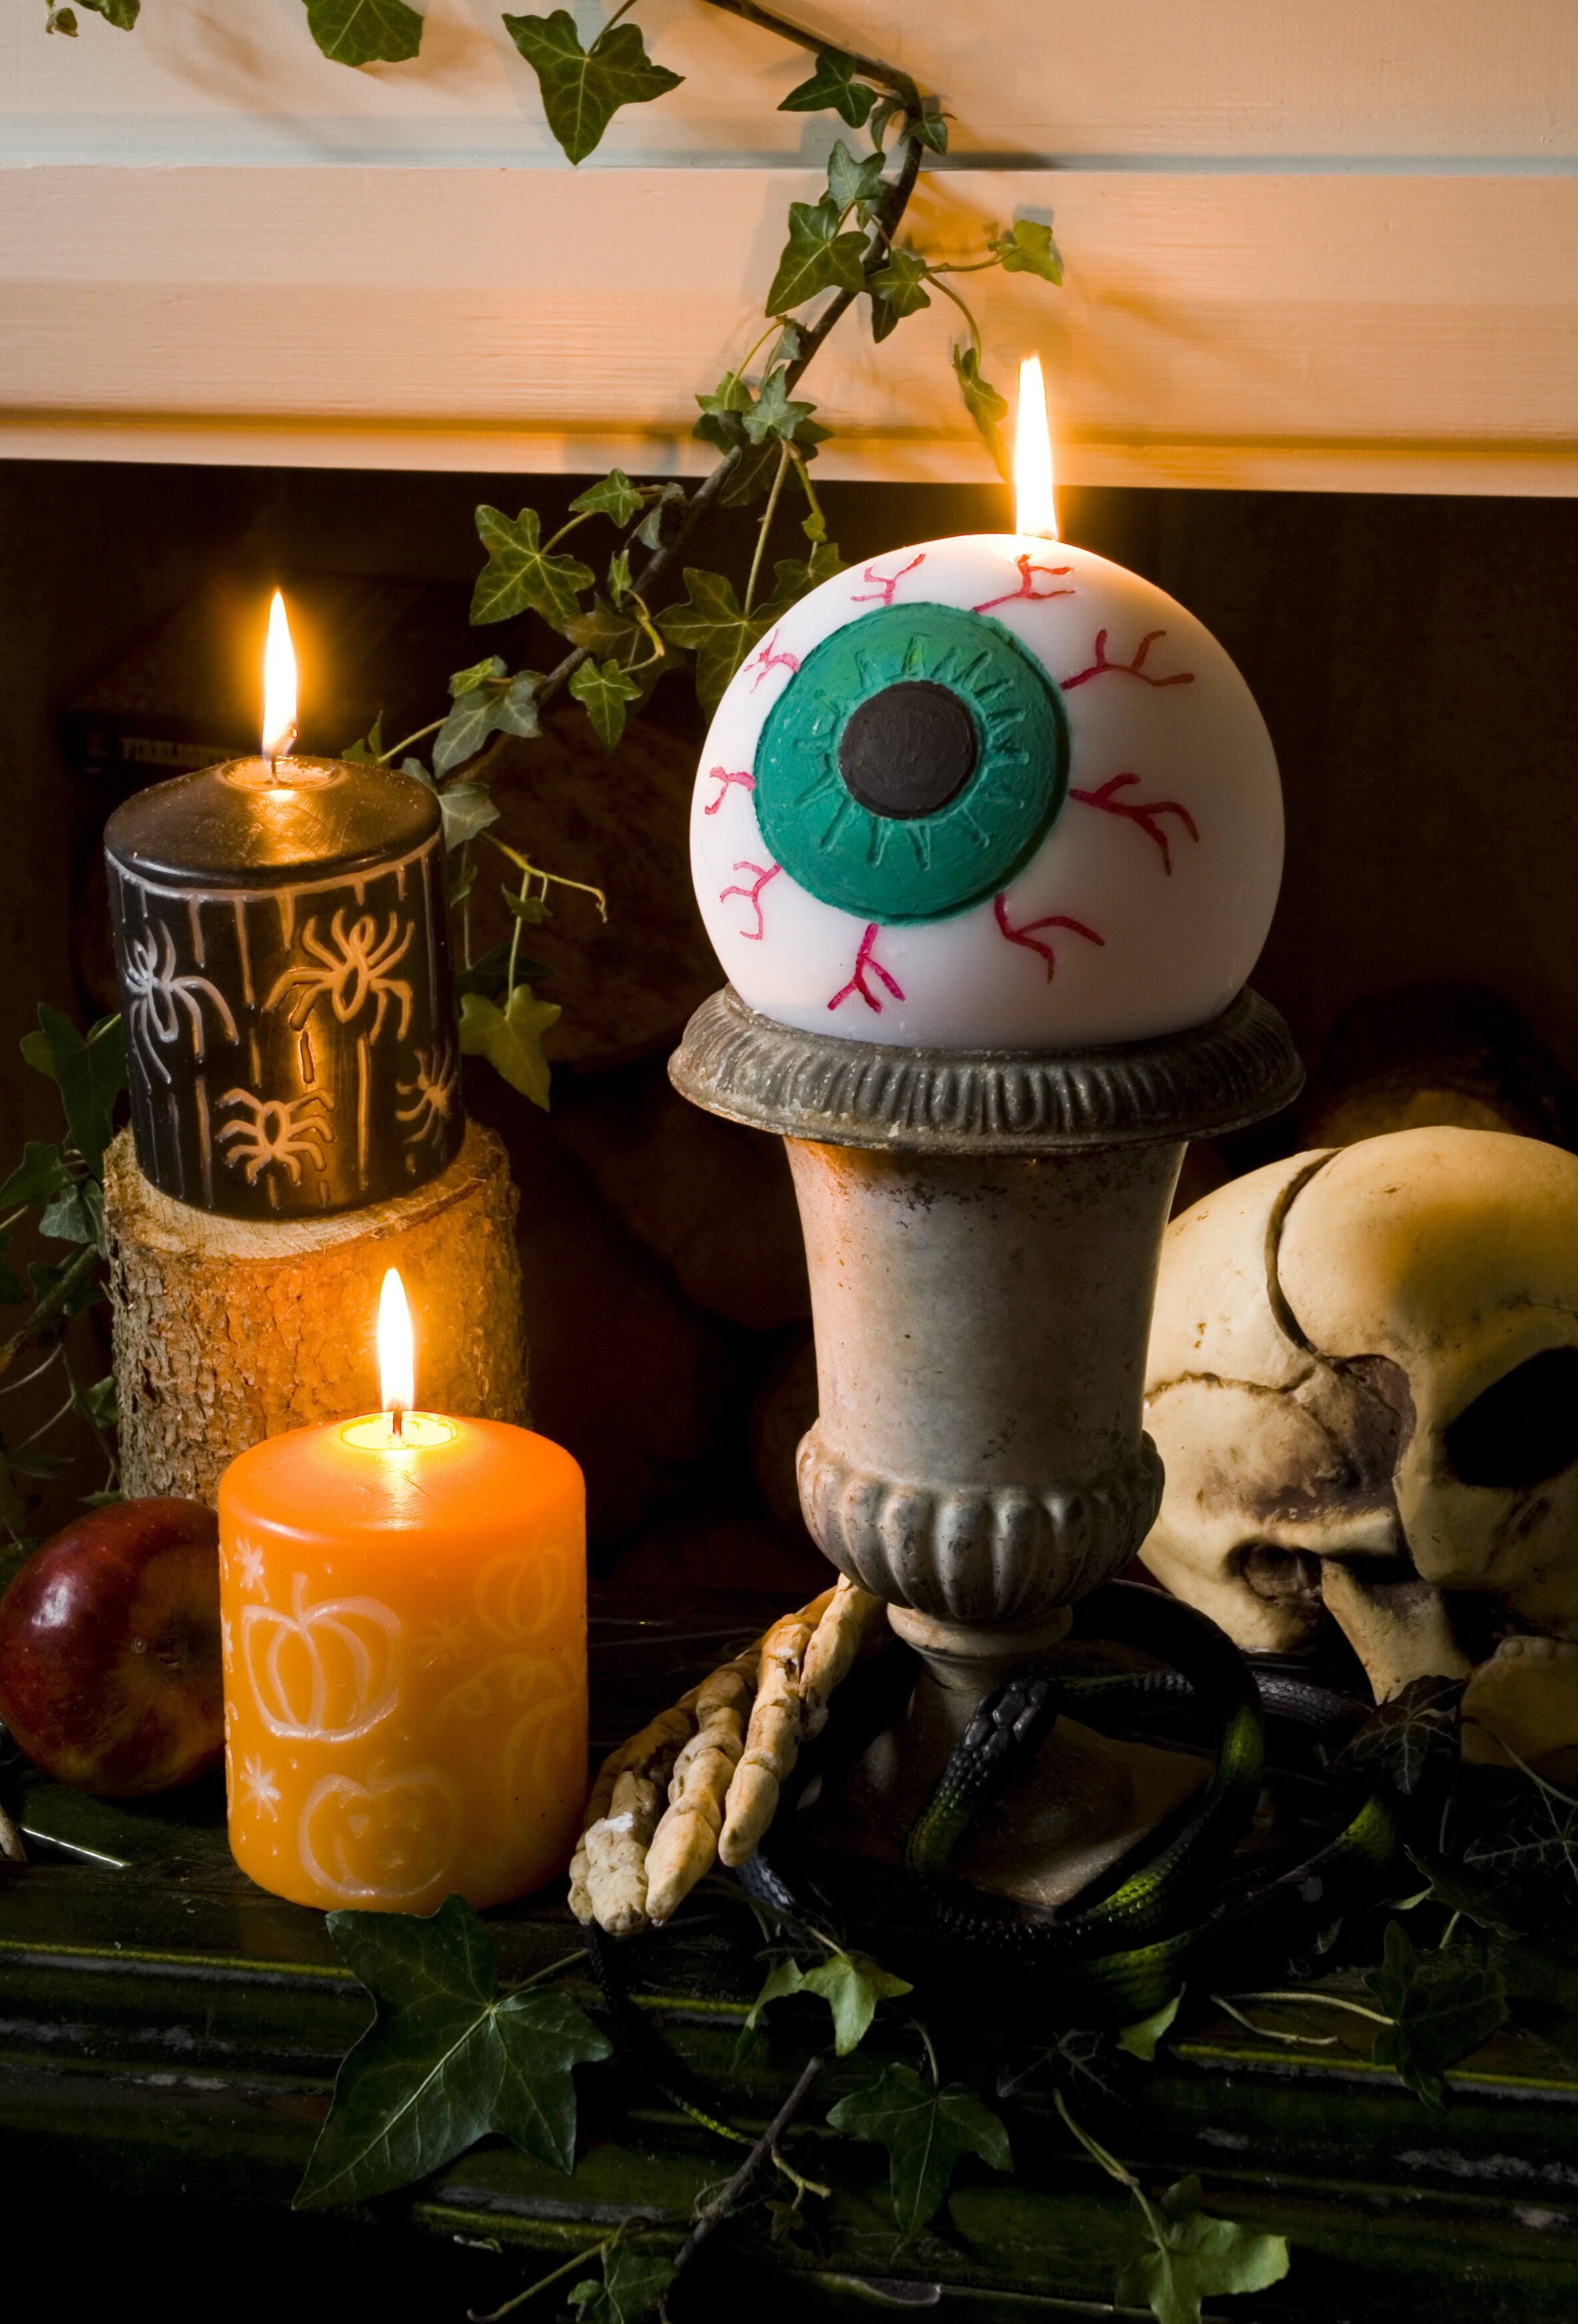

If you’re looking for some quick and scary DIY Halloween decorations, carving and painting your own candles is a frighteningly easy project to try. You just need to grab your Dremel multi-tool, a carving accessory, a candle, some paint and you’re on your way to scaring dinner guests and trick or treaters alike!
Before you start
Read our DIY Safety Tips guide and your tools’ instruction manuals to keep yourself and others safe.
Tools:
Materials:
- Pillar or large circle Candle
- Pencil
You can download our print at home How to Make Halloween Candle instructions here.
Step 1: Draw your design
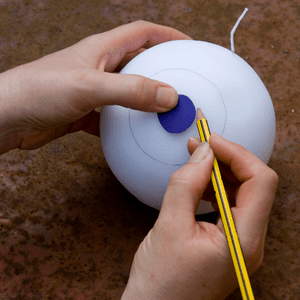
Draw your design onto the candle with a pencil, pressing lightly initially and more firmly when you are happy with the design.
Top tip: If you want to practise first, sketch your design onto tracing paper and then transfer it onto your candle by retracing over it.
Step 2: Carve out the design
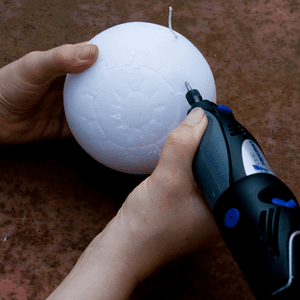
Using a Dremel multi-tool and engraving cutter, engrave the design onto the candle. Work slowly and steadily, so the lines are of an even depth.
Step 3: Clean the surface
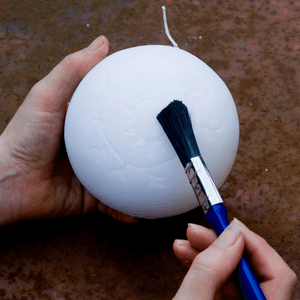
Brush the surface of the candle with a soft paintbrush to remove any excess wax, and give the candle a wipe with a damp cloth. Allow the candle to dry.
Step 4: Paint the candle
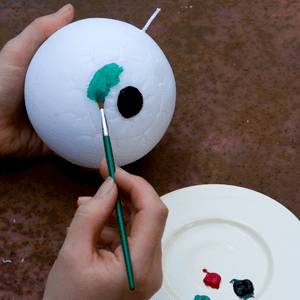
Paint over the engraved lines using gouache paint and a fine paintbrush to bring out your scary design!
And that’s how to create your own Halloween candles! Don’t forget to share your DIY Halloween decorations with us @Homebase_UK on Instagram.


