DIY

DIY Headboard Ideas

Homemade woven headboard with decorative cushions

Learning how to make a headboard is a simple way to create a stunning new focal point in your bedroom and allows you to add a personal touch to your interiors. Often, buying a new bedframe is an unnecessary expense – so, try creating a cheap DIY headboard instead! From easy upholstery to a DIY wooden headboard, we’ve gathered a few of our favourite DIY headboard ideas to provide a little inspiration.
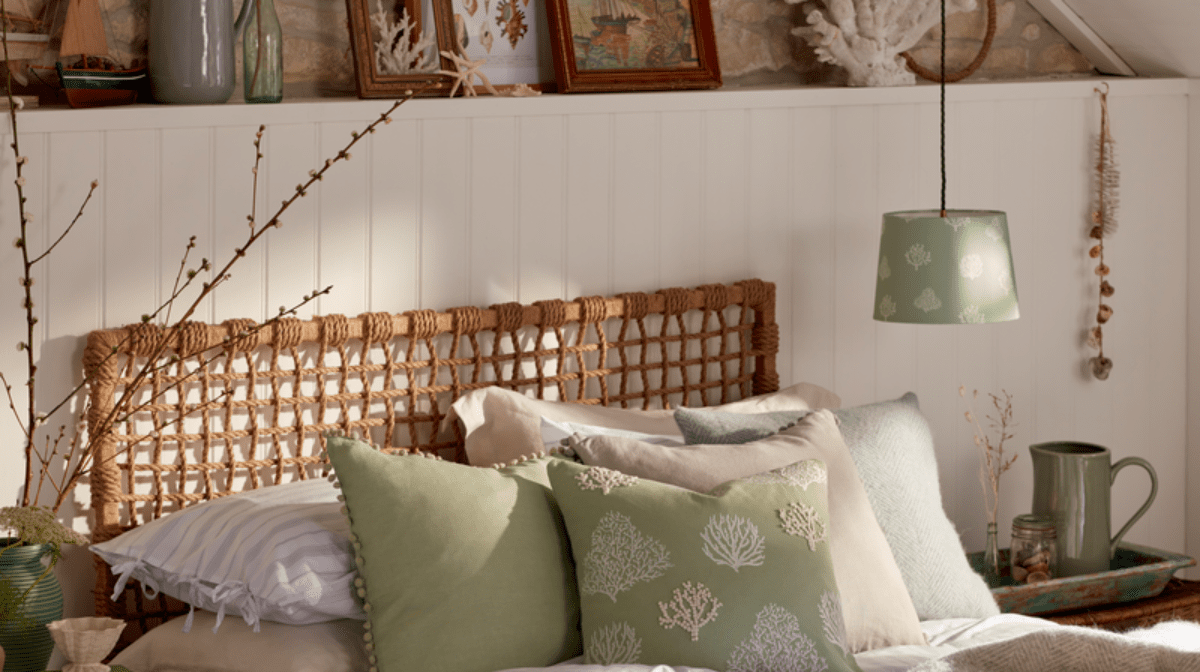
A rustic rope weave

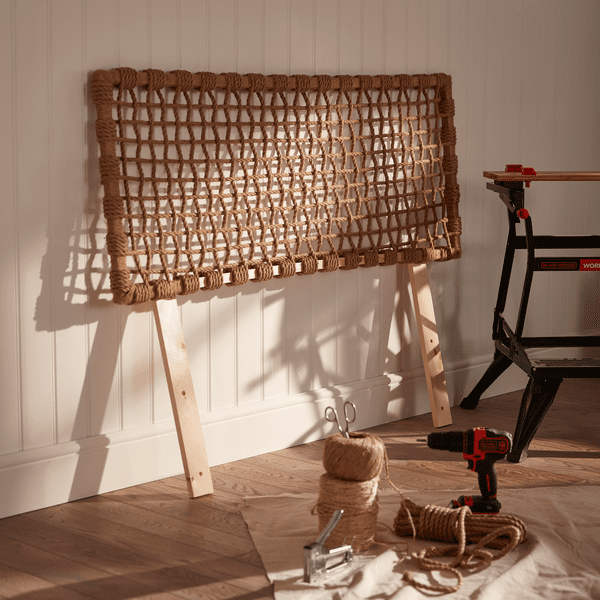
A stunning nod to simple Scandinavian interiors, why not give our woven DIY headboard project a go? Requiring minimal equipment and materials, it’s a great way to add a little flair to your sleeping space. Simply follow these easy steps, referring to the handy visual guide below.

webimage-954EAB34-1486-47EF-9F006F3F65B272FE_1662038198
webimage-18A5F7BF-0830-4D15-A0364245BC437E29_1662038190
webimage-8AC8D5E1-D5E8-45E8-96638774EF1F051C_1662038193
webimage-777086EA-D4E4-465E-804A7DC070992BDC_1662038188
webimage-6CFE1C80-8631-4107-A77665379FFD0F43_1662038200
webimage-DD32EEE1-D926-4FB7-AD9ACF57713DFE82_1662038202
webimage-DFDE4E92-0731-47CF-A780672170EC1DB4_1662038195

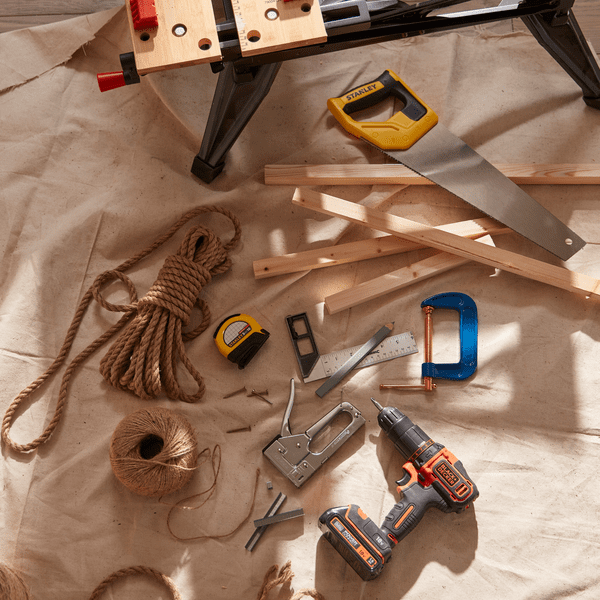
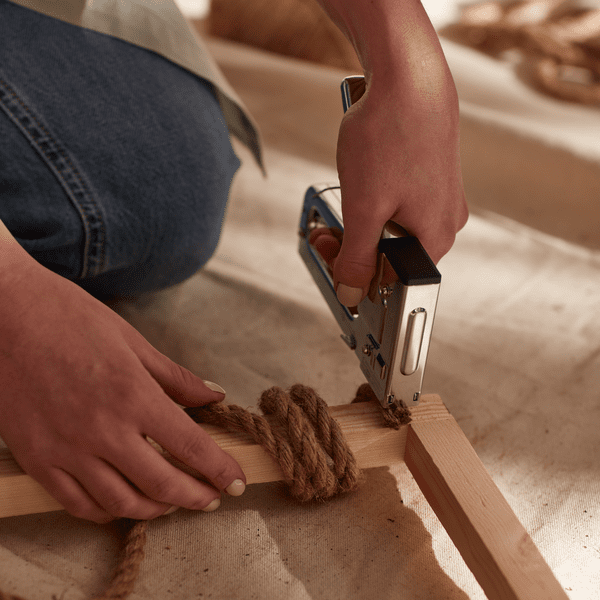
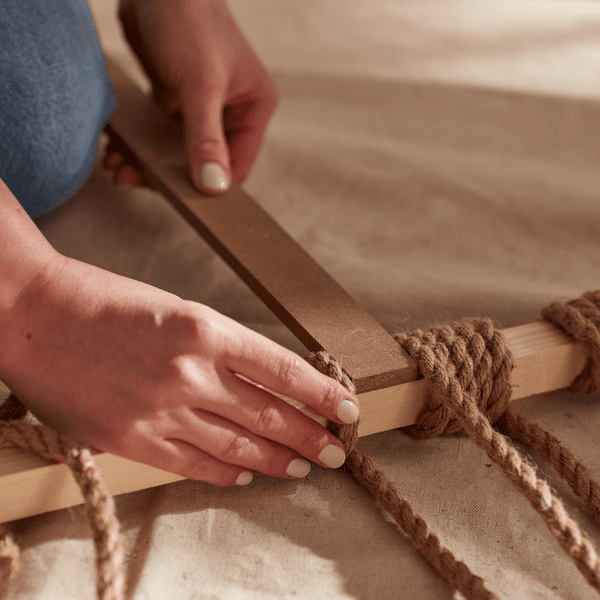
First, you’ll need to create a sturdy rectangular frame, which will form the main structure of your headboard. Next, you’ll need a long length of medium-thickness rope. Wrap the rope around your frame four times, securing the end with a staple gun. Pull the rope taut across the width of your frame, wrapping it around the opposite side in the same way. 

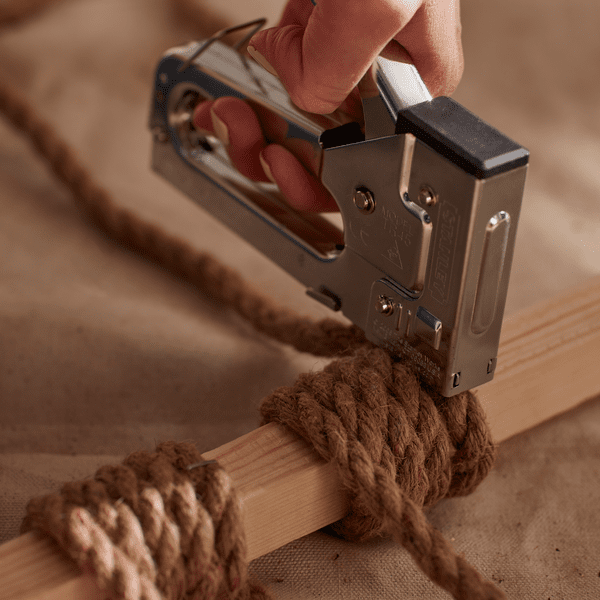
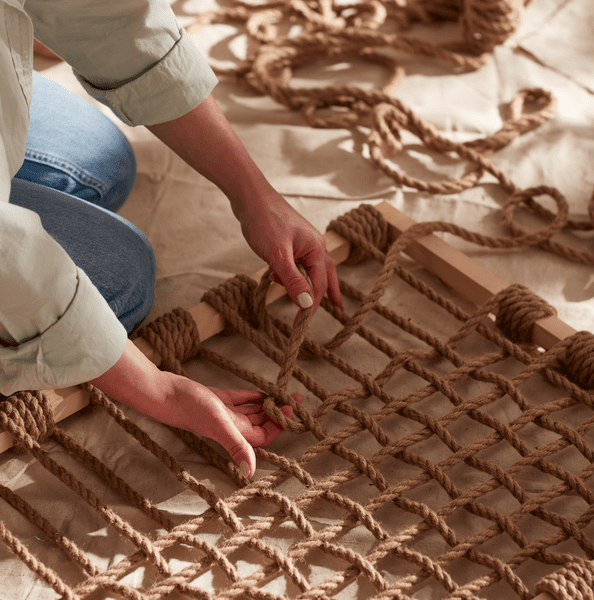
With one diagonal rope in place across the width of your headboard, train the rope back across to the side of the frame you started on and wind around the wood again. Repeat this until the headboard is covered, using a spacer to ensure equal distance between each rope line and fixing the rope in position with a staple gun. 

With your horizontal lines complete, you can start to attach the vertical ropes in the same way. To create the Scandi-inspired weave effect, alternate your vertical rope under and over the horizontal lines. 

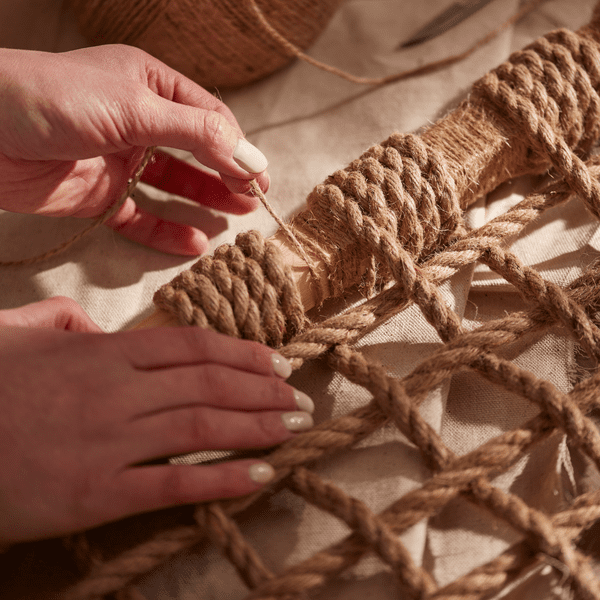
Once you’ve worked across the headboard with evenly spaced vertical lines, you’re almost done! As a finishing touch, wrap brown gardening twine around the remaining exposed wooden frame to complete your beautiful and unique DIY headboard.

A wooden DIY headboard  

Whether from large deliveries or old renovation projects, many of us have wooden pallets taking up valuable space in our sheds and garages. With a little DIY know-how, spare pallets can be transformed into a beautiful and unique DIY wooden headboard. 

Begin by dismantling your pallets and sanding any rough edges. If you’re planning on painting your pallets, it’s easiest to do so before assembly. 

Vertical, horizontal and herringbone designs all create a desirable rustic finish. You may find it easiest to work with a MDF base or wooden frame that you can directly fix your wooden slats onto. Cut your wood to size and attach using a drill. Once you’ve achieved your chosen design, smooth any exposed edges with sandpaper before attaching thin wooden legs so that your new headboard  sits snugly behind your bed. 

Top tip: Familiarise yourself with our DIY safety tips before using power tools to keep safe while you make your own headboard. 

Hang out with a fabric headboard 

A simpler take on a DIY upholstered headboard, a hanging textile headboard adds a bohemian feel to your space, creating a calming environment that helps you to drift off to sleep. To get started, fix a curtain pole above the bed at your desired height and remove any curtain hooks. Curtain poles with an antique-effect cage finial are great if you’re going for a shabby-chic look. 

When making the body of your headboard fabric DIY, you can really get creative. Two large cushions hung from the pole with matching fabric ties is a stylish option that doubles as a soft headrest for lazy weekends spent reading in bed. Either make your own or find pre-made cushions and run up some fabric ties on the sewing machine. 

Alternatively, a single curtain-style hanging makes for an eclectic finish. Experiment with your favourite textures and patterns and attach to the curtain pole with fabric loops. For extra padding, add wadding behind your fabric hanging. 

Top tip: For advice on how to fix your curtain pole, take a look at our guide to hanging curtains. 

Big on colour, little on space 

If space is a limiting factor in your bedroom, a painted headboard makes for a striking feature without taking up any extra room. A block colour semi-circle will perfectly frame your bed and is easier to achieve than you might think. 

To mark out your painted headboard on the wall, start by measuring the desired height and width of your semicircle. Cut a length of string to this size. 

Tape your string to the centre of where the semi-circle will sit, just above the skirting board. Tie a pencil to the other end and, holding the string taut, begin to trace a semicircle outline on the wall. Once outlined, you’re ready to paint – bold, contrasting colours work particularly well here. 

Top tip: For a flawless finish, read our guide to painting walls and ceilings before you get started. 

Bold wallpaper prints 

Patterned headboards can be costly and difficult to get hold of, but you can create your own with the help of your favourite wallpaper. Whether you have an existing headboard that needs a new lease of life or are making your own from MDF or leftover wood from a previous project, even the simplest structure can be transformed with this neat headboard DIY idea. 

Simple shapes work best here, so that the bold print can do all the talking. If you’re constructing your own headboard, assemble a flat, rectangular surface using MDF or planed timber. Your headboard should be slightly wider than your bed so that it perfectly frames it. Remember to attach legs so that your headboard has something to rest on. For a snug fit, these should be slightly shorter than the combined height of your mattress and bed. 

Once you’ve selected your wallpaper, you can get to work. Paper your headboard as you would a wall, taking care to pattern match at the joins and using a wallpaper smoother to iron out any bubbles and creases. 

Top tip: Our guide to hanging wallpaper will help you to get a flawless finish. 

A slatted DIY wooden headboard

Whether you’re drawing inspiration from New England architecture or want to introduce a nautical feel to your bedroom décor, a wooden slatted headboard makes a great finishing touch to any sleep space and can be adapted to fit beds of all sizes. 

Before getting underway, cut an MDF or planed timber backing panel to your desired width and height. Taking your thin wooden slats, cut them to the same height as your back panel. Unless using smoother pine slats, sand any rough edges. With your wood prepared, paint it in your desired colour. If you plan on leaving small gaps between the slats, paint the back panel in a different colour to create a lovely contrast. 

Apply adhesive along the back of your first slat, place it vertically against the back panel and secure with a brad gun. If you are leaving a space between slats, create a spacer by cutting a slat to the desired width of your gap. Use this to ensure that each slat is the same distance apart before securing. Repeat the process until you’ve worked your way along the width of the back panel. 

As a finishing touch, add a slat horizontally across the top of your new headboard to create a handy shelf and neaten off any raw edges. 

Top tip: If you get stuck, follow the technique used in our simple guide to building a wood slat wall.

 Now that you know how to make a headboard, you can try out our DIY headboard ideas before splashing out on an entirely new bedframe. A great way to save money, have fun and create something that’s totally unique to your home, share your creations with us @Homebase_UK and explore our Ideas & Advice page to find inspiration for your next project. 


Homebase

Homebase

Writer and expert