
The most important part of any bath is your plug, also known as the waste. No matter what beautiful bath design you pick, it’s not going to be much fun if it doesn’t drain properly. If your bath waste is getting old, stiff, or out of date, now’s the perfect time to fit a new one – and we’re here to show you how with our handy step-by-step guide. Shall we get started?
What you’ll need:
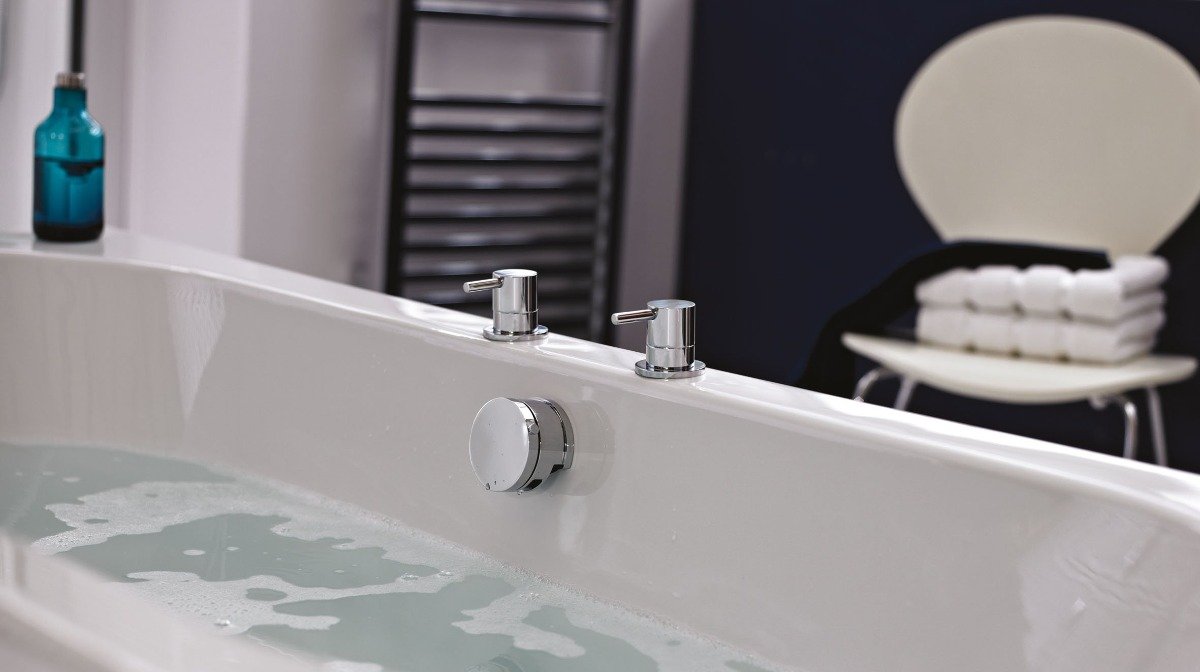
What is a bath waste?

A bath waste is typically divided into two parts. The first is the part of your bath where the plug sits – used to drain the water away once you’re finished. The second part is the overflow, which is a pipe that – as the name suggests – gets rid of excess water if the bath fills up too much, stopping it from spilling over the top.
How to fit a bath waste
Ready to get started? Our step-by-step guide will help you remove your old bath waste and get your new one installed in no time.
Step 1: Remove your old bath waste
The best place to start is to remove your drain fitting from the bottom of your bathtub. There are a few different styles of fittings, so you may need to unscrew your drain cover before you get to it.
Once you do, find the single screw in the centre of your waste cover and use your screwdriver to unscrew it. That should mean you can now remove the outer bath waste from the bath.
Step 2: Disconnect your overflow
Your bathtub’s plug isn’t the only place that has screws to remove – your waste overflow pipe will too. Twist off the plate on top, remove any screws and pull the cover plate off. With that gone, you can start taking out your overflow pipe, which runs from your bottom plug up to the overflow behind the bath.
It sounds complicated, but you just need to unscrew the connectors at each end – which should just be held in place with nuts, meaning a spanner is all you need. Once they’re loosened, you can disconnect the pipe at both ends and remove.
Top Tip: Occasionally, you might find your waste pipes have been glued or soldered in, so they might need to be sawed free from the bath instead.
Step 3: Reattach your pipes
Next, it’s time to start installing your new bath waste and overflow system. Take everything out of the box and spread it out to make sure you have everything you need. After all, it’s difficult to know how to fit a new bath waste if you’ve got pieces missing!
Once you’re sure it’s all there, start on your new system by connecting your plastic pipe to your new bath wastes at both ends.
Step 4: Install your bath’s waste
From the outside, push one end of your waste pipe so it’s flat with your bath plug and connect it to the tailpiece underneath. Once it’s connected, you can put the new waste cover on from the inside of the bath.
The other end of your pipe should connect up to your overflow hole at the back of the bath – either screwed into the overflow rose or the back of a new waste cover depending on the style and design of your bath.
If you’ve fitted every part of the bath waste yourself, now’s the time to test how waterproof it is by running a good amount of water (at least 4 to 5 inches) into the bath with the plug closed and checking it doesn’t drain on its own. If it holds the water, and then drains quickly – you’re good to go.
Top Tip: If you’ve chosen a pop up bath waste, make sure the twist mechanic is working at both ends before you screw everything shut.


