

When you are planning to create your dream bathroom, it’s easy to get carried away with the design and aesthetic and forget about the practicalities! Measuring your bathroom should be one of the first things you do before you start looking at tubs and shower enclosures – that way, you know exactly what can and can’t be done with the space you have to work with.
If you’ve never measured a room before, then don’t panic – it’s not rocket science! In fact, it’s a fairly straightforward process that doesn’t take long to do. Follow our step by step guide below and you can’t go wrong.
Before you start
Remember to always measure using millimetres (mm). Construction dimensions are always displayed in the same format, width across the front, then height, then depth. As an example, if you see 40mm x 60mm x 20mm, then this actually means 40 width, 60 height and 20 depth.
How to measure your bathroom
Step one
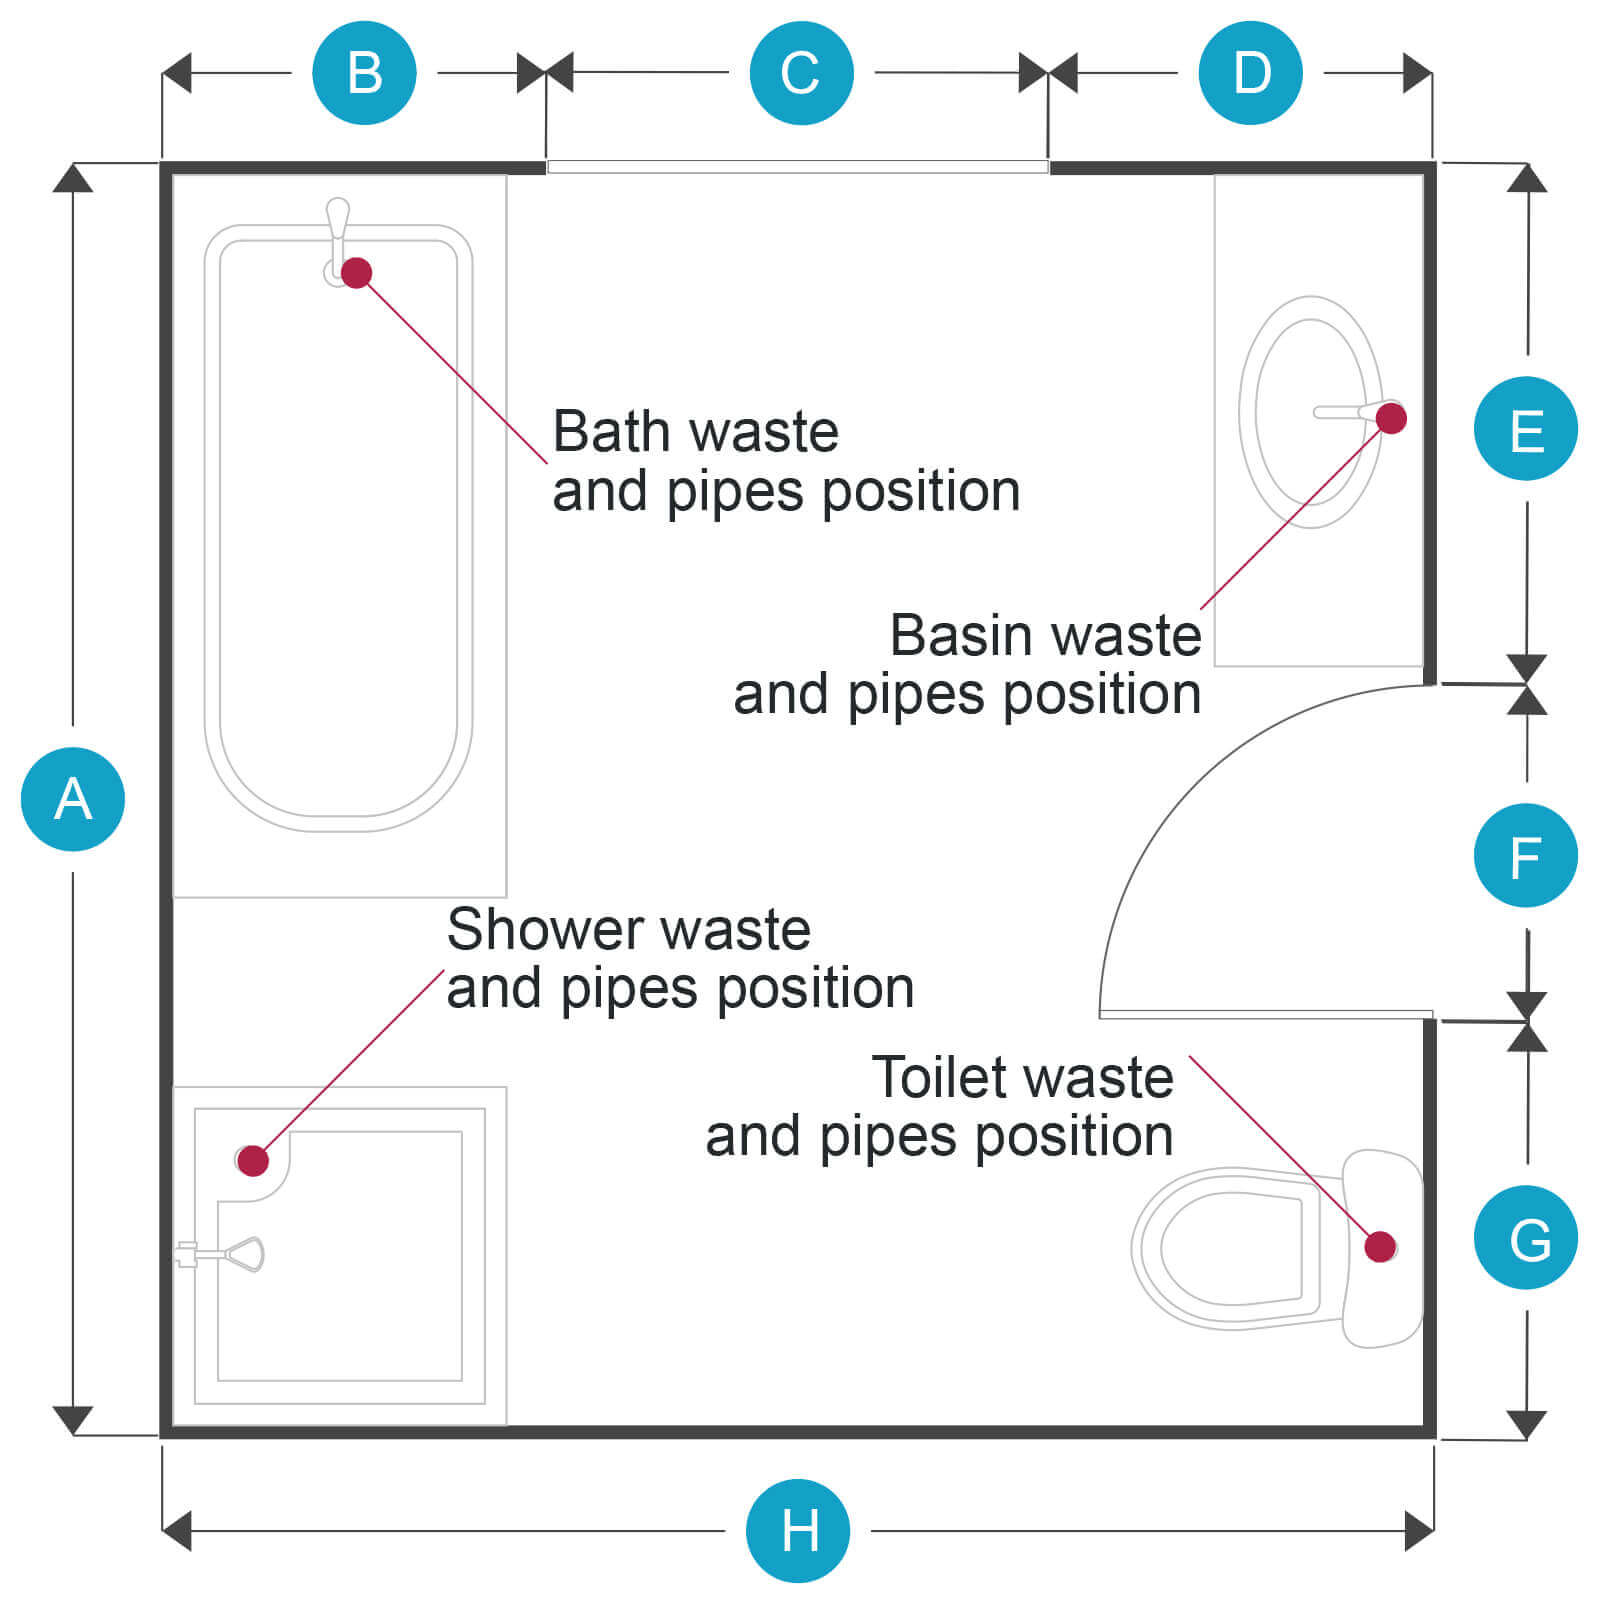
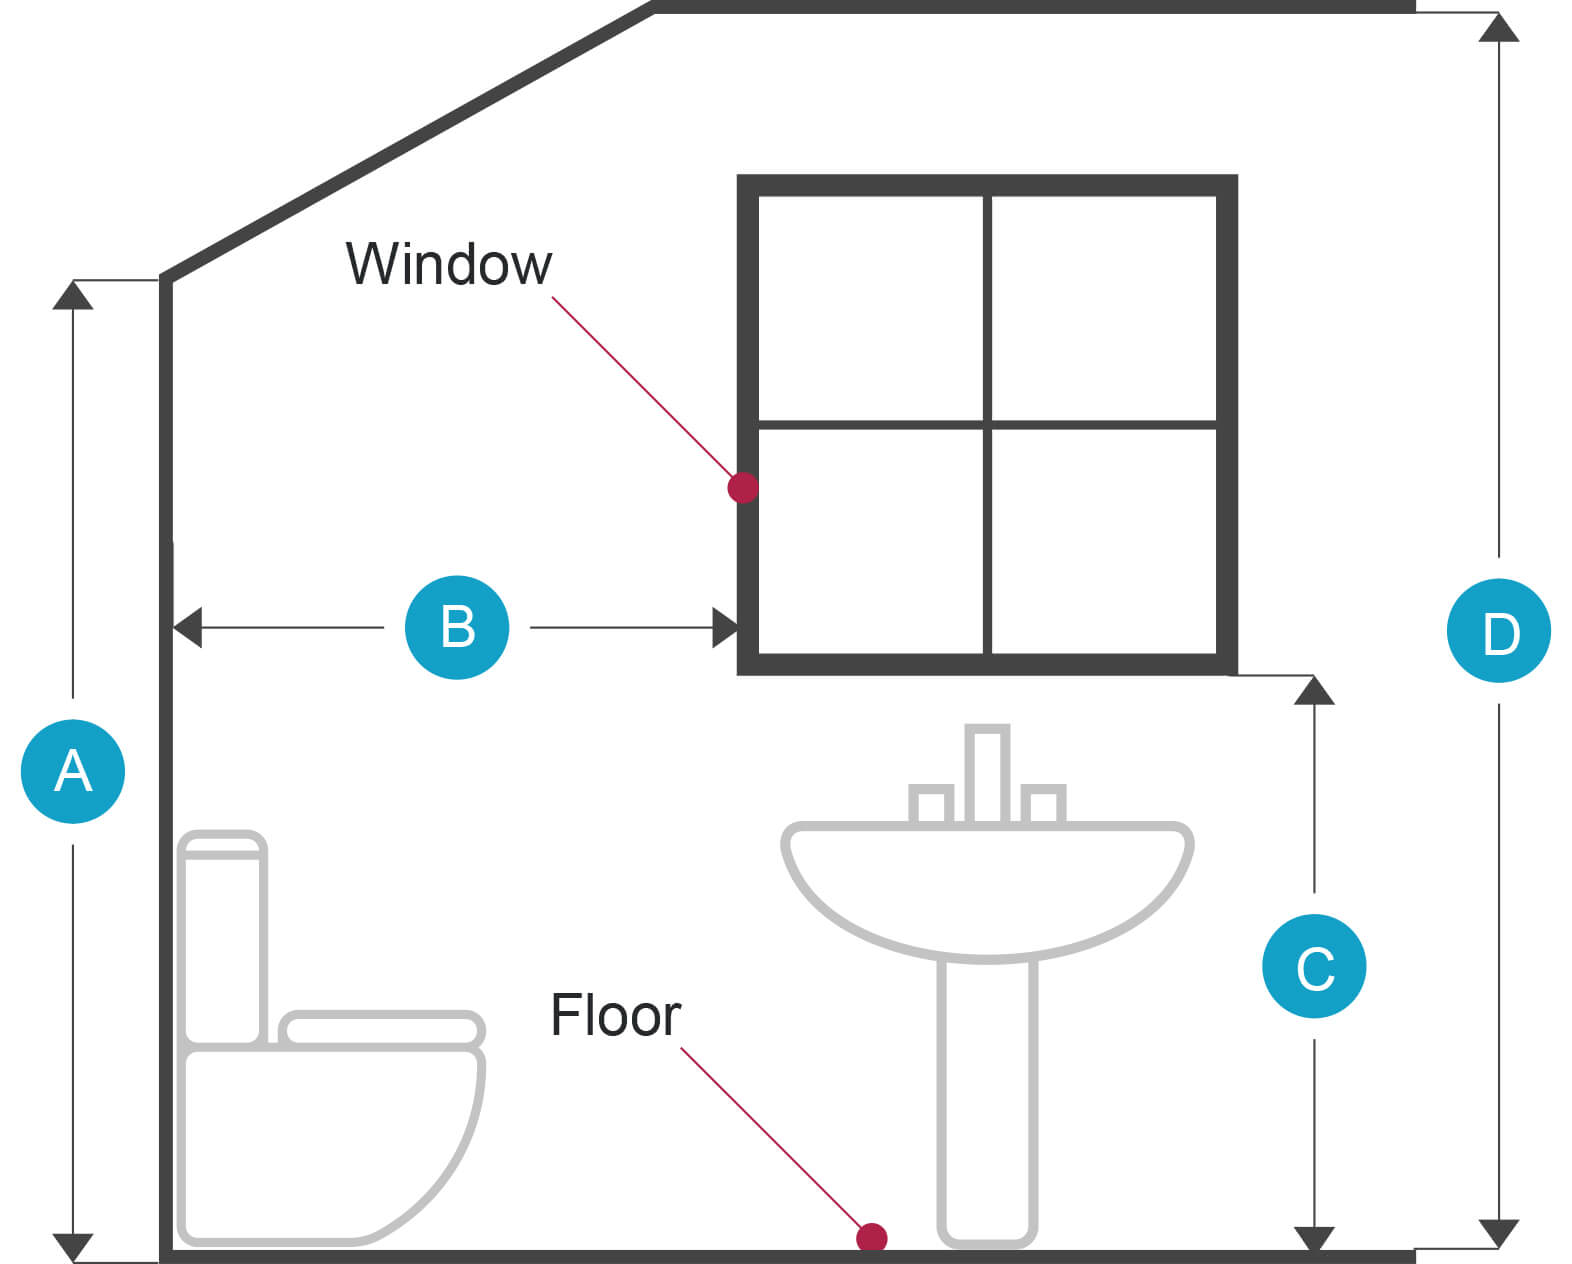
Draw a diagram of your overall bathroom, using a pencil and ruler – remember it doesn’t have to be a work of art (save your creative flair for later, when choosing the design). For now you just need a simple diagram, which details where any windows and doors are. Remember to include any unusual specifics, such as odd angles, obstructions, or anything else you will need to factor into your renovation plans.
Step two
Take a tape measure to your bathroom walls to find out their exact lengths. When noting down any doors in your diagram, don’t forget to illustrate whether they swing in or out.
Step three
When measuring your shower, make sure you measure the central drain from the two closest 90 degree walls. Detail the shower arm and head in your diagram, and note down your type of toilet (e.g. wall mounted).
Step four
To measure all the bathroom doors and windows, begin in the top left of your diagram and work your way clockwise around the room until you’ve made a note of every length and width.
Step five
With windows, remember that you must also measure the distance from the floor to the bottom of the window and from window to ceiling.
Step six
On the outside of your diagram, note down the name of the adjacent room, and if one such room is one you intend to knock through to make room for your new suite, measure that entire room too.
Step seven
Next, note down and measure any fixtures or fittings that will remain in the room, including radiators, air vents, pipes etc. Measure the width, height and depth of the fixture as well as the space between the object and the floor, or ceiling if appropriate.
Step eight
Next, you should measure the space between any fixtures and the nearest walls.
Step nine
When measuring the height of the ceiling, you might want to take the measurement in several places. It is not uncommon to find ceilings which vary in height by several inches in the same room, especially if you have an older property.
Step ten
Finally, it’s important to check your measurements are correct before you do anything else, to avoid any potentially costly mistakes. Use common sense, so ensure that parallel walls match, and then the same with floor and ceiling.
That’s it! You’re good to go. Now it’s time to start planning the perfect bathroom – why not check out our 2D bathroom planner and bring your ideas to life?


