Difficulty rating: Medium
These tasks may be tricky so will suit you if you're experienced in DIY, or simply love a challenge.
Before you get started on any of our 'how to' guides, please take a moment to read through our DIY safety tips.
What you’ll need:
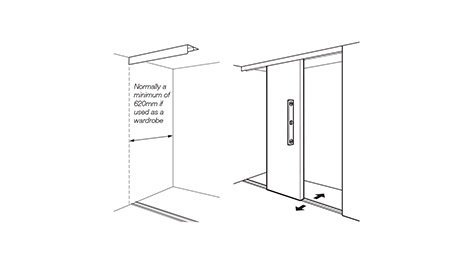
Our standard sized sliding doors are ideal for creating a space-saving storage solution. Simply work through our easy-to-follow installation guide to get a professional-looking finish.
Please read through these instructions carefully before starting assembly.Carefully open the packs supplied and check the contents against the parts and fittings check list. Do not dispose of the packaging until you are certain that you have all the necessary parts for the assembly. The manufacturer reserves the right to alter specifications without prior notice.
Top tips:
- Please ensure that the packaging is disposed of in a safe environmentally friendly way.
- There are small components used in the construction of the door frame. These loose items should be kept away from young children whilst assembling.
- Protect the high finish of the tracks by using a suitable material on the working surface during assembly.
- Make sure there aren't any pipes or cables where you are drilling.

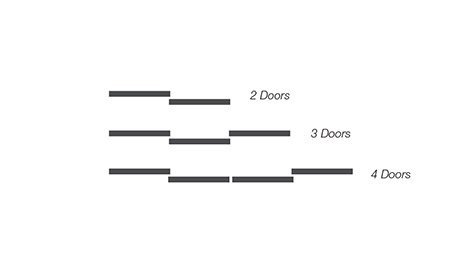
Identify and, if necessary, construct the correct opening width for your doors using the table below.
All doors are made to fit a standard opening height of 2260mm. A higher ceiling can be reduced using spacer blocks or opening heights reducers
We provide these components with your wardrobe doors and track-set. Components marked with * are supplied in the track-set. The top guides and bottom wheels are pre-fitted to the wardrobe doors.
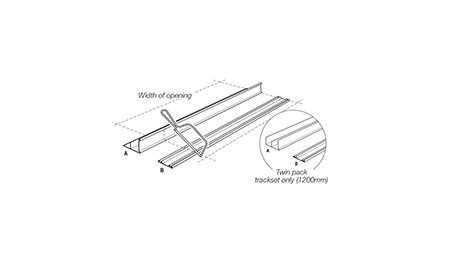
Step 1. Sizing the sliding door tracks
Step 2. 2. Installing the wardrobe sliding door tracks
Step 3. Positioning the doors
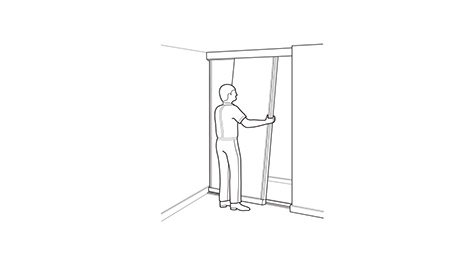
Step 4. Installing the doors
Step 5. Engaging the top guide
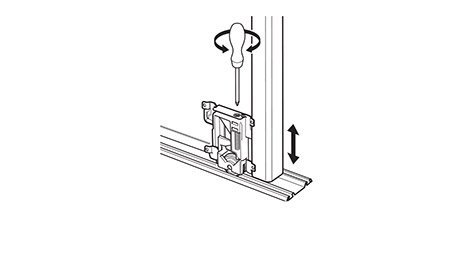
Step 6. Adjusting the sliding doors
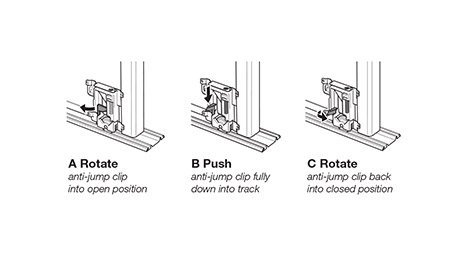
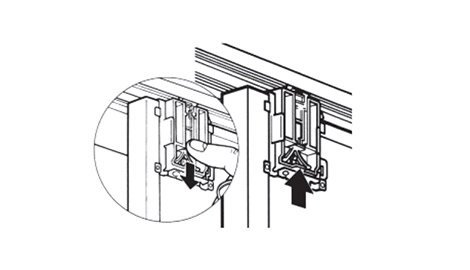
Step 7. Engaging anti-jump clips
Related Articles