
Want to keep your veg away from animals and small children or simply don’t have the space for a regular garden? Then a raised bed might just be the answer to your prayers. From patios to corner plots, it’s easy to build a beautiful vertical garden – ideal for growing your own veg, with better drainage, all while saving your back at the same time.
You will need:
-
Prepare your plot
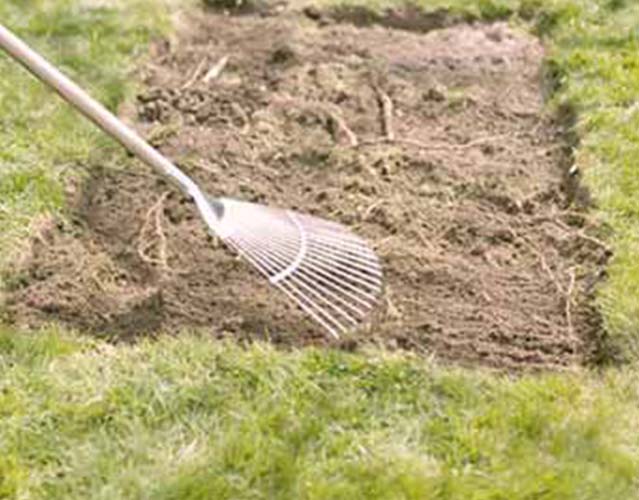
Wondering where you should put your plot? If you have the choice within your garden, pick somewhere that gets a decent amount of sunlight each day – ideally between 4 and 6 hours. Depending on which way your garden faces, try to aim your raised bed north to south, so the plants don’t shade each other as they grow. When it comes to measuring out – if your boards are pre-sized, lay them out flat with the inner corners touching. Then mark out your plot with string, using the boards as a guide. For regular un-sized timber, mark out the plot size you want first, then cut your wood to match. Next, to give your raised bed the best change of forming deep roots and proper drainage, it’s crucial you take the top layer of turf off. So, grab your spade and dig up the top layer all the way round, using your string outline as a guide. If you’re struggling, you can always put down a layer of newspaper or tarp for a week or so to kill the patch of grass – making it easier to remove. -
Building your frame
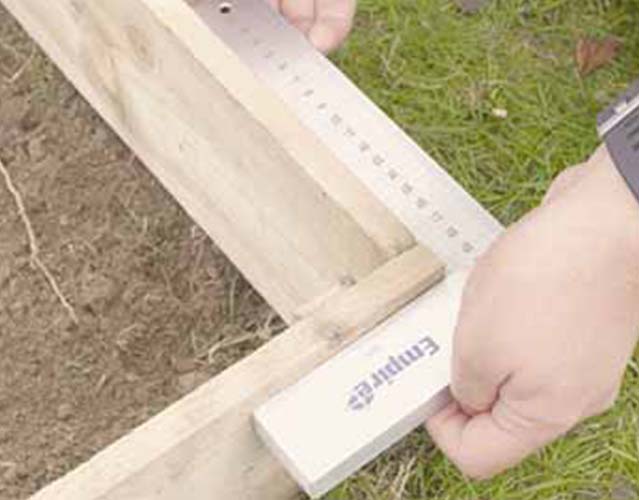
Once the turf’s off, mark out your corners with retaining stakes or pegs. Hammer them in with your mallet, leaving enough poking out to attach your boards to, before making sure they’re level with your spirit level. Feel like your raised bed needs more side support? Once your corner stakes are in, you can add extra pegs along the sides between them – ideally about a metre apart. Use your string border to help keep them in line. Worried about your wooden stakes rotting under the soil? Dab a little preservative on the ends to help them last longer. Now it’s time to fix your wooden sides to the stakes. Attach them at the corners using galvanised screws – checking they’re straight with a try square before screwing in the extra side stakes if you’ve used them. For a final check, you can measure between opposite diagonal corners. If the measurements match, your raised bed should be square! mattis. -
Fill your bed
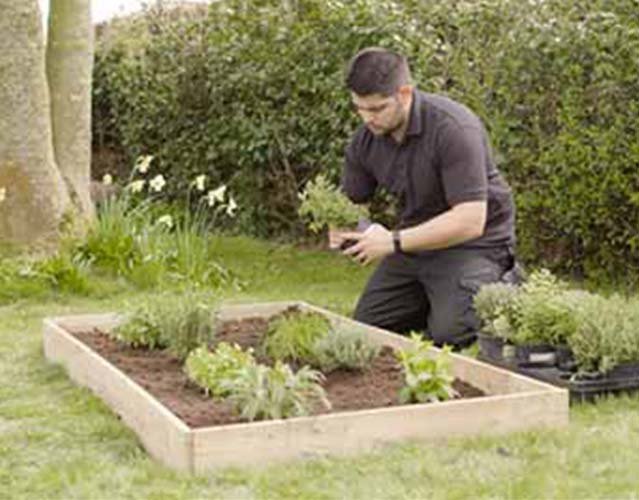
Using your spade or a garden fork, turn over the exposed soil to loosen it up – giving a fresher base for your bed. When it comes to filling – choosing your compost depends on what you want to grow in it, so pick one that suits! Some gardeners prefer to mix a little topsoil and mulch into their compost if they’re growing a variety of vegetables, so be sure to experiment with your mixture. Soil in a raised bed is known to shift and settle, so give it a week or two before sowing or growing anything. That way you can top up any sunken spots in advance. Once everything’s planted, keep it well watered – especially in the hot months, as your raised bed will dry out faster than that rest of your garden!