

Plasterboarding is a handy skill to learn if you’re planning any home improvements – and it doesn’t take long to get the hang of the basics.
Difficulty rating: Medium
These tasks may be tricky so will suit you if you’re experienced in DIY, or simply love a challenge.
Before you get started on any of our ‘how to’ guides, please take a moment to read through our DIY safety tips.
What You’ll Need:
- Drill
- Tape measure
- Spirit level
- Bolster Chisel
- Craft knife
- Screws
- Plaster scrim tape
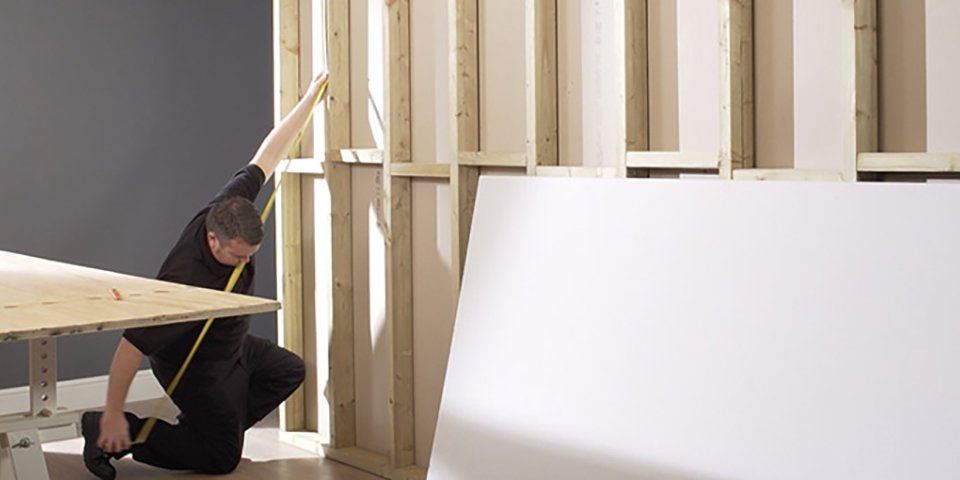
Step 1
Start by measuring the sheets so they’re 12mm less than the floor-to-ceiling height.
Step 2
Mark the cutting line on the ivory side of the plasterboard, then cut along it using a craft knife and straight edge.
Step 3
Turn the plasterboard over and fold the end along, then cut to snap the board. Use a craft knife to cut through the paper backing.
Step 4
Get someone to help you attach the plasterboard to the frame – it’s much easier with two people. Wedge a bolster chisel at the foot of the board, slide a wood off-cut underneath and use your foot to press down and force the board hard up against the ceiling. Make sure you fit the plasterboard with the ivory side outwards.
Step 5
Fix the board in place with 32mm plasterboard screws at roughly 150mm intervals, 15mm away from the edges. Carry on fitting whole boards in the same way as before, cutting them to fit above the doorway and against the adjacent walls. If you also have a skirting board, you’ll need to notch the plasterboard to fit around it.
Step 6
Remember to finish off the joints with plasterboard tape, to give your wall a smooth finish.


