
One of the most popular interior decoration styles over the past few years, a gallery wall is the perfect way to bring a sense of inspiration and imagination to your home. From transforming bland backdrops to giving your living room a real focal point, gallery walls are quick, simple and straightforward to create – and our handy guide is here to show you how.
What you’ll need:
- Prints or photos
- Photo frames
- Tracing paper
- A pencil
- Toothpaste (optional)
- Hammer
- Nails
-
 wall art in a new and interesting way, spicing up your interiors with character and personality. But first you need to decide what pictures you want to display in your photo frames – and it usually comes down to three main options:.
- Personal art: Whether self-created or collected over many years, many build a gallery wall from their own selection of photography and art.
- Wall prints: From animals to botanicals and impressive landscapes, wall prints usually come in a themed set – ready made to be displayed.
- Mixture: A combination of the two, bringing pre-selected photography together with your personal favourites to match a loose overall theme – you!
Choose your pictures
A gallery wall is designed to show off your favourite wall art in a new and interesting way, spicing up your interiors with character and personality. But first you need to decide what pictures you want to display in your photo frames – and it usually comes down to three main options:.
- Personal art: Whether self-created or collected over many years, many build a gallery wall from their own selection of photography and art.
- Wall prints: From animals to botanicals and impressive landscapes, wall prints usually come in a themed set – ready made to be displayed.
- Mixture: A combination of the two, bringing pre-selected photography together with your personal favourites to match a loose overall theme – you!
-
Choose your frames
Just as important as the photos you choose are the frames you pick to put them in. Should they blend in with the wall colour, contrast or stand alone entirely? The choice is all yours. Additionally, consider the sizes of your artwork. If you want the keep the colour of your frames identical, you may well need different frame sizes to fit all your artwork in. By working out these elements in advance, you can ensure the best-looking photo frame wall possible.
-
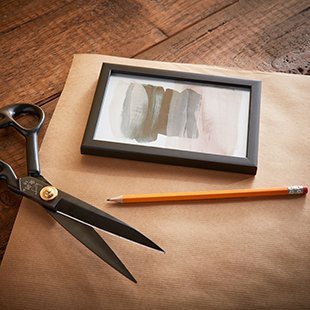
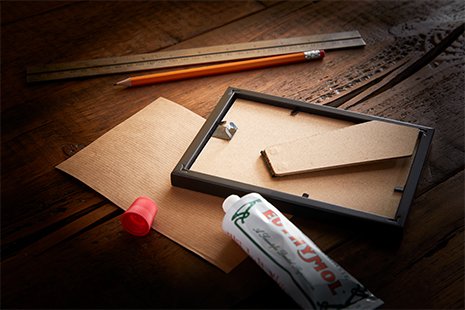
Create your templates
Grab some tracing paper or, if you don’t have any, borrow some baking parchment from the kitchen. Place your frames on the paper and draw round them to make templates for each one. -
X marks the spot
Once your template’s made, lay it flat over the back of your frame and mark where the hanging point is with an ‘X’, so you can line it up later.
TOP TIP: If you want to find your mark easily, dab a little toothpaste on the hook and press your template down onto it. The toothpaste should transfer to the template, showing exactly where your nail or screw needs to be.
-
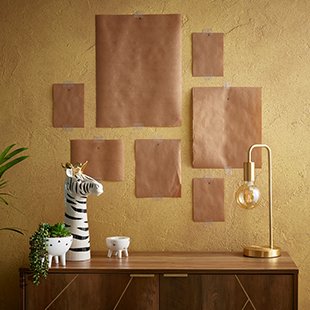
Framing up
Lay out your frames on the floor to help decide what pattern you want your framed wall art in on the wall. Gallery walls tend to fall into two styles: a linear ‘grid’ pattern, or a more eclectic, rounded ‘salon’ pattern. When you’ve decided on your pattern and photo arrangement, attach your templates to the wall, carefully following the pattern on the floor.
-
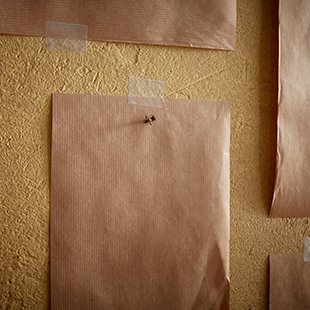 hammer and nails. Tap your nails into the wall through the ‘X’ on each template, then tear the templates away – leaving your nails in the right position for each frame."
tabindex="-1"
aria-hidden="true"/>
hammer and nails. Tap your nails into the wall through the ‘X’ on each template, then tear the templates away – leaving your nails in the right position for each frame."
tabindex="-1"
aria-hidden="true"/>
Get it nailed
-
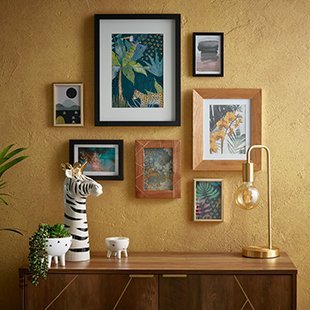
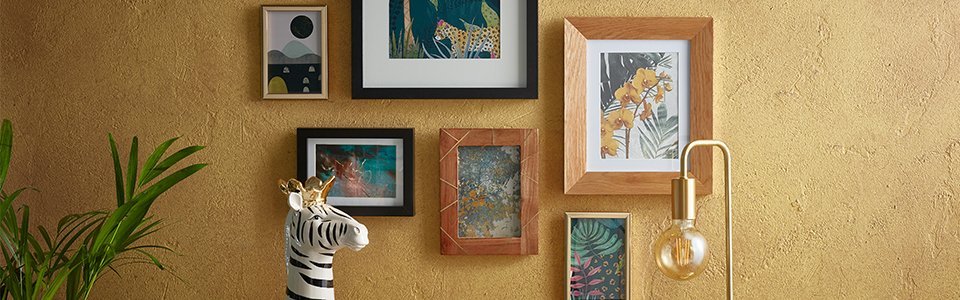
Hang your pictures
Finally, it’s time to hang your pictures in place. Pop them on their pegs, then take the chance to step back and admire your brand new, personalised gallery wall.