

Push forward cyclists, we’ve got the perfect how to build your own wall-mounted bike rack step-by-step guide for you. Helping you save on floor space while acting as a cool interior feature, this wall-mounted bike rack is stylish yet practical.
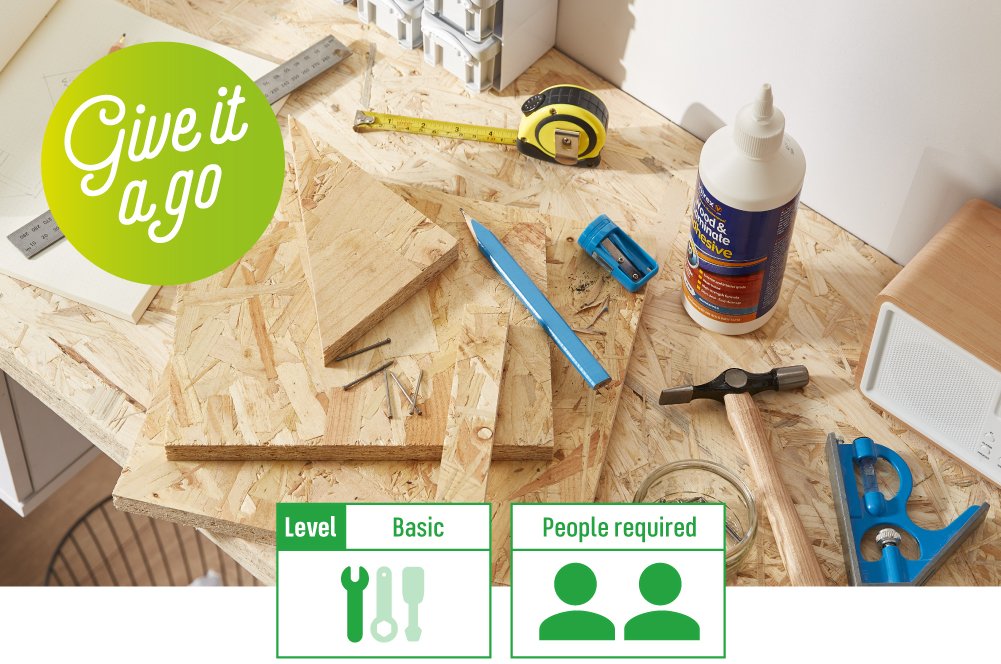
With some basic tools, we’ll show you how you can quickly transform some chipboard into a neat storage solution for your muddy bike.
Let’s start with what you’ll need.
Materials:
Tools:
- Drill with masonry and screwdriver drill bits (for concrete and brick)
- Circular saw
- Sandpaper
- Tape measure
- Combination square
- Spirit level
- Wood glue
- Claw hammer
- Pencil
- Safety goggles
- Dust mask
- Ear defenders
- Electronic wire and pipe detector
-
Read our DIY safety tips and manufacturer instructions
Before you begin any DIY work, we recommend you read our DIY Safety Tips guide along with your power tool manuals to keep yourself and others safe and protected while completing this How To guide.
If your wall has any holes or cracks, you can find out how to repair them here.
If you’re in doubt about anything, you should reach out to a certified expert for assistance.
-
Check the type of wall
First, you need to know what type of wall you are going to be working with. Different wall types require different fixings and can hold different weights.
Top tip: For this project, we only recommend doing it on a Masonry wall.
-
Ensure there are no hazards
Use the electronic wire and pipe detector to ensure there are no hidden hazards behind the wall you will be drilling through.
Hold the device in one hand against the wall and place the other hand flat against the wall, about 20-30cm away, to ensure grounding.
Never drill directly above or below a light fitting or power socket because that is where its supply cable will most likely be.
Top tip: To avoid confusing the detection device, remove any jewellery. And to check the device works, pass it over another electric point where you know cables will be behind the plastered wall – like at a plug socket or light switch.
-
Cutting your chipboard
You will need your circular saw to cut your chipboard to size.
Use your tape measure and mark out your pieces in pencil – you’ll have 4 in total:
- 1x 30x30cm square
- 1x 18.5x25cm square
- 1x 13x17x21cm right-angled triangle
- 1x 18.5x3cm rectangle
Before you start cutting, make sure you have your safety goggles, ear defenders and dust mask on – and you’re in a well-ventilated area.
-
Prepping your chipboard
Now everything’s cut to size, give the edges of your chipboard a quick smoothing out with your sandpaper.
-
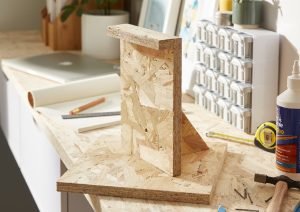
Gluing together your bike rack
Rotate your large squares 45-degrees. Then, take the smaller square and use your wood glue to stick one full length of the small square to the larger one.
This will act as the ledge your bike sits on.
Then, glue the triangle piece of underneath the ledge, so it sits at a 90-degree angle. Followed by sticking the rectangle onto the ledge, so your bike can’t slip off.
Top tip: Use your combination square to ensure you’re getting the angles correct. And don’t forget to leave it to dry for the recommended drying time as per the instructions on your wood glue.
-
Screwing together your bike rack
We want to ensure your bike rack is as secure as it can be. So, wearing your safety goggles again, take your drill and screwdriver drill bit and drill in some screws around the edges you have just glued together.
Top tip: To prevent the wood from splitting, you should drill pilot holes into your wood before driving in your screws – this will also make the drilling of the screws an easier task.
-
Drill your holes
Remember, you can only do this on a masonry wall and don’t forget your safety goggles.
You’ll need a hole at each corner of where you plan to hang your bike rack and your spirit level to ensure your holes are level.
Use your heavy duty wall plugs to determine the size of the masonry drill bit you need for your holes. Then, using the hammer action on your drill, drill your holes as straight and cleanly into the wall as possible.
After, tap in your wall plugs carefully with a hammer.
Top tip: Wall plugs are great for adding extra support when hanging heavier items.
-

Secure it to the wall
Now, use your drill and screwdriver bit to fix your rack into the wall with screws at the holes you have just created.
-
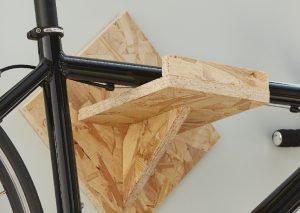
Grab your second person!
With the help of another person, carefully lift your bike up onto the rack and test it out.
Top tip: Once you have checked everything fits accordingly, we recommend you wait a few hours before hanging your bike up in its new home. So why not head out on a bike ride while you wait?
That’s your Wall-mounted Bike Rack complete.
Don’t forget to upload an image of your new wall-mounted bike rack to social media, tag and follow us @Homebase_uk


