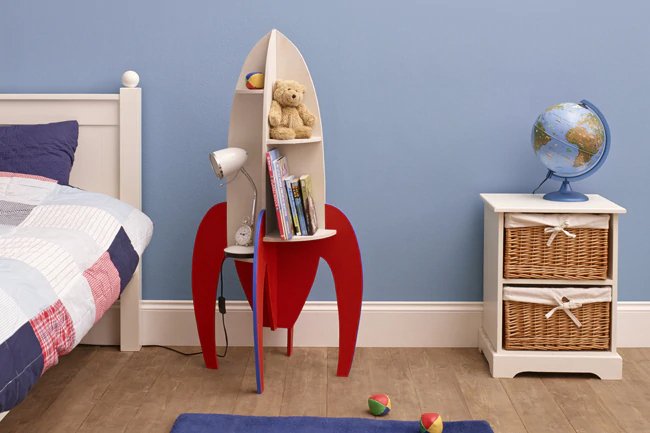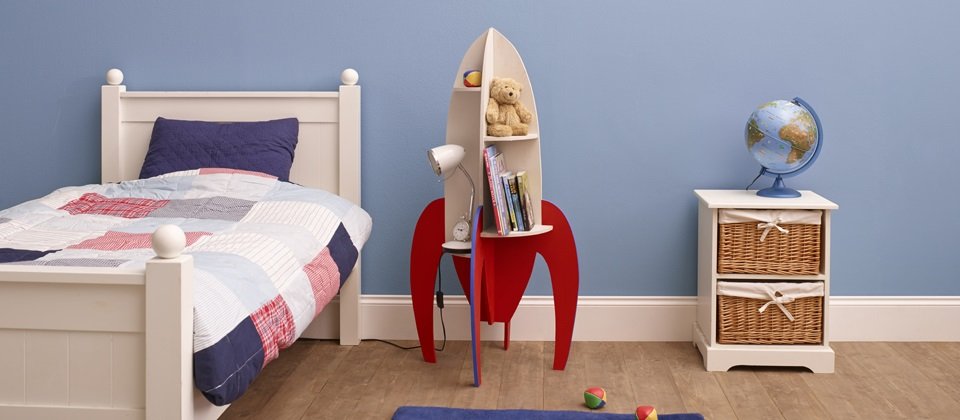
Whether it’s for the playroom or their bedroom, have a blast designing furniture for your children with our latest home project. From jigsaws to sanders, all you need are some simple power tools and a spare weekend to create a fun, family-friendly table that the kids can love for years to come. So, if you’re wondering how to make a stunning wooden space rocket table, our simple step-by-step guide is here to help.
What you’ll need
-
To make your life easier, we’ve already designed a simple space rocket stencil ready for you to use – so the best place to start is downloading it (you can find this in your materials) and printing it out. The stencil’s in A1 size, which means that unless you’ve got a big printer or a local printing shop – you’ll have to print it out on 8 sheets of A4.
-
With all your A4 sheets printed out, grab some masking tape and start sticking them together along each edge until you’ve got your whole stencil laid out and secured. Next, cut out your stencil on a chopping board with a sharp Stanley knife.
-
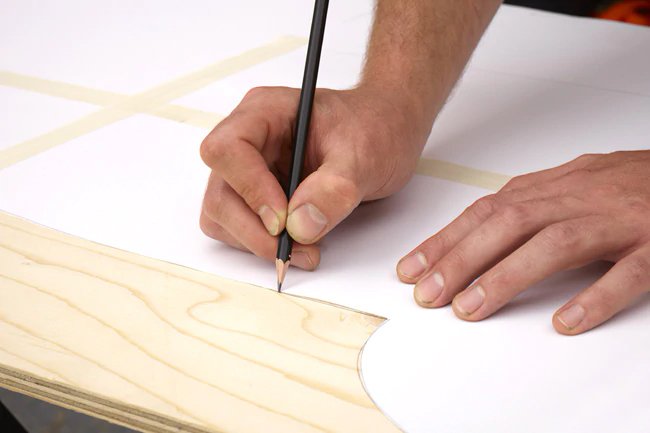
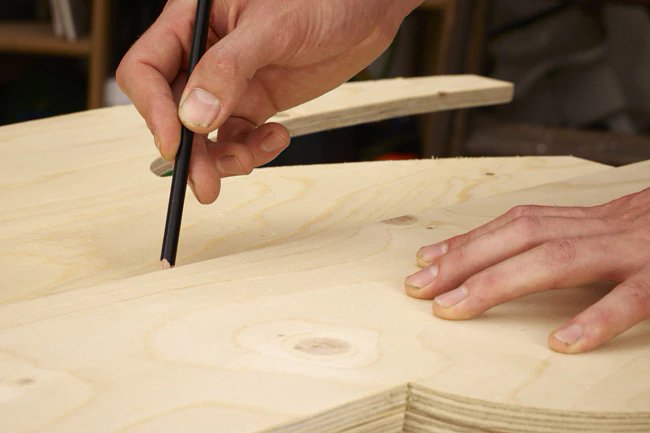
Once your stencil’s cut out, it’s time to turn to your large piece of plywood. Place your stencil on top, and repeat the pattern on your wood by drawing round it with a pencil.
-
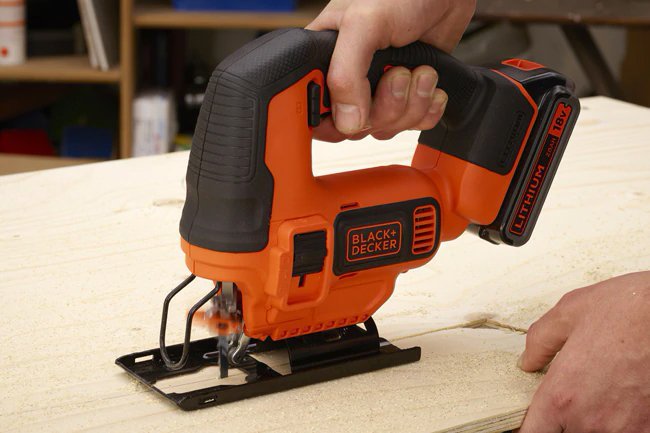
It’s power tool time, so clamp your plywood to a workbench, grab your jigsaw and start cutting carefully around the rocket template you’ve just drawn. It’s easiest if you start with the outside first before tackling the middle sections, otherwise you can end up trying to cut thin, tricky pieces. Once it’s all cut, collect all your rocket pieces together.
-
When it comes to building the wooden space rocket, the simplest place to start is the shelves on all four sides. We’ve decided to mix and match shelf heights to make it easier to store things of different sizes – so the shelves next to each other won’t be the same height, but those opposite each other will.
-
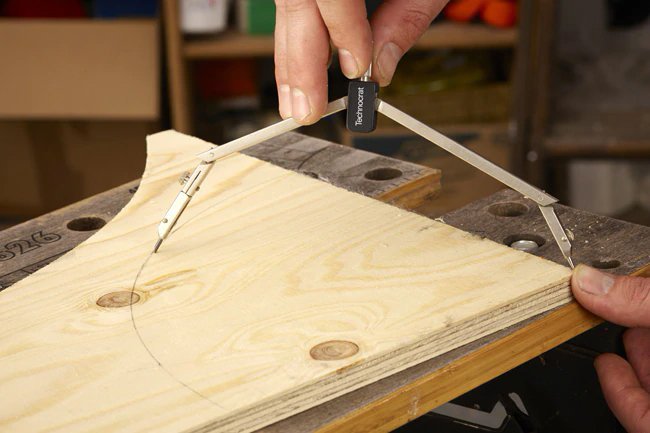
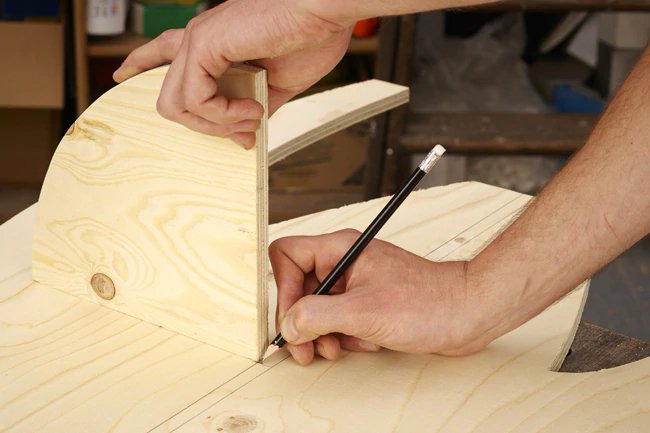
Taking one of your half base parts (where the fins are), measure the width where you want your shelf to go with a compass. Then, without moving the compass, move it to a spare piece of plywood and use it to draw an arc round a corner (making sure it’s 90 degrees) – giving you the perfect shelf size. Repeat for your other seven shelves, and then pick up the power tools again and use your jigsaw to cut them out.
-
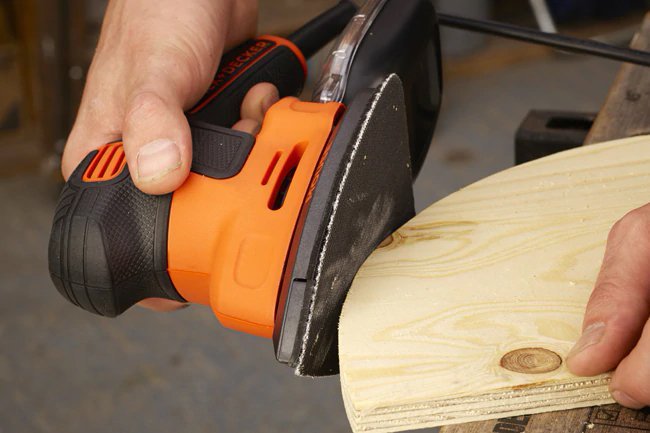
Once your shelves are assembled, take the opportunity to sand them down before going any further. In fact, sand the whole rocket and pieces until they’re nice and smooth to save you from splinters and make painting a whole lot easier later on.
-
Next, we need to mark up all our spacings and drill points. Take your full rocket piece and place one of the half pieces on top so you’ve got a straight line down the middle. Mark this line with pencil, then flip the half piece over and do the same with the other side. If you’ve done it right, you should now have a thin strip of about 12mm marked down the centre of your biggest rocket piece.
-
Place your shelves where you plan to put them, up against the middle strip – then draw a horizontal line across the shelves’ top edge. Working backwards from the top edge, make two marks 6mm underneath, and 30mm from the shelf ends to work out where to drill. Then repeat for all your other shelves.
-
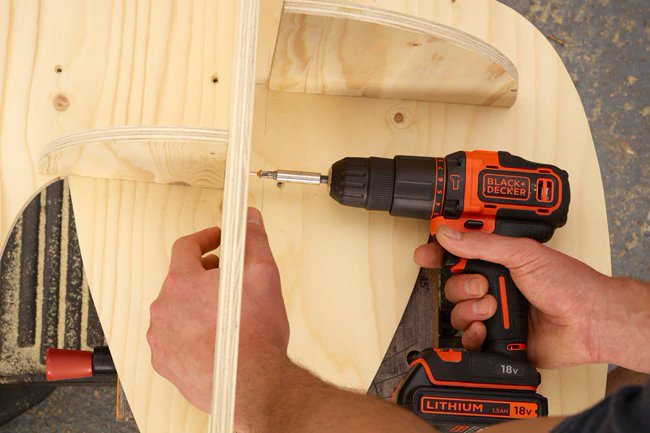
Using 30mm screws, put a 3mm drill bit and drill pilot holes through the pencil marks you’ve made on your wooden space rocket. Then line up your first shelf’s top edge with the line you marked and drive your screw through both pieces of plywood. Continue the same steps for your other shelves, using them to join the base units together at the same time. TOP TIP: When you’re joining the halves of your rocket together, make sure the top and bottom of your rocket line up evenly, otherwise it’s likely to fall over when you’ve finished.
-
With your wooden space rocket finished and all the shelves attached, there’s only one thing left to do – give it the personal touch with a splash of colour. Pick your perfect shade and get painting, leaving time for it to dry before moving it. Then, all that’s left to do is show it to the little ones!